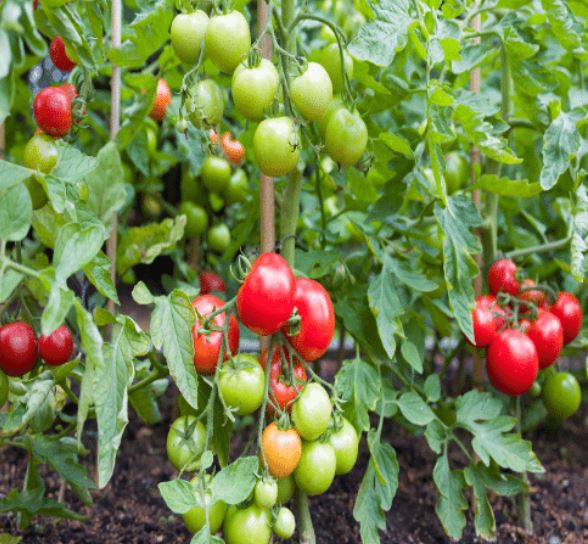
Tomatoes are the most popular vegetable crop for home gardeners, and for good reason. A single well-grown plant can yield 10 to 15 pounds or more of flavorful fruit. The short answer: To grow tomatoes successfully, you need full sun (6–8 hours daily), rich well-draining soil with pH 6.0–6.8, consistent deep watering, regular fertilization, and sturdy support for the vines. Whether you are a first-time gardener or a seasoned grower, following a systematic approach from seed selection to harvest will reward you with an abundant crop of juicy, homegrown tomatoes. This comprehensive guide covers everything you need to know—from choosing the right variety to storing your harvest—so you can enjoy the unmatched flavor of garden-fresh tomatoes all season long.
Understanding Tomato Plants
Before you start growing, it is essential to understand what tomato plants are and what they need to thrive.
Botanical Identity and Characteristics
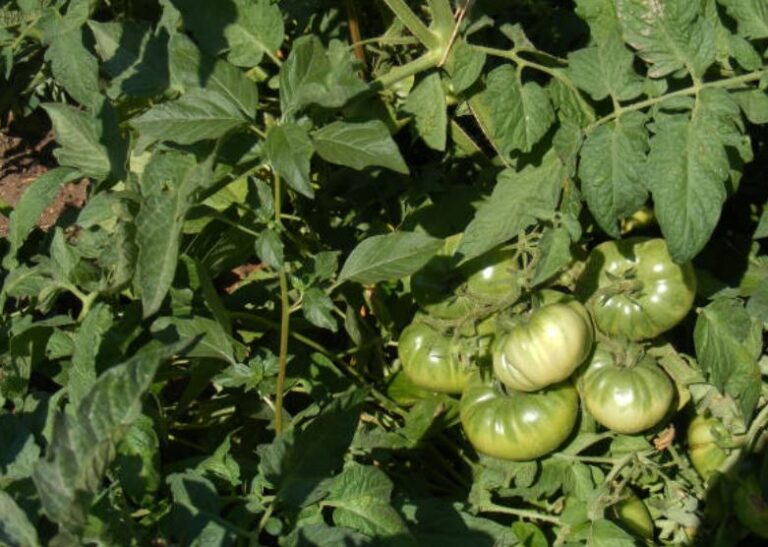
The tomato (Solanum lycopersicum) is an herbaceous, usually sprawling plant in the nightshade family (Solanaceae) that is typically cultivated for its edible fruit. It is a perennial but is usually grown outdoors in temperate climates as an annual. Tomatoes are very tender, warm-season annual plants—frost will injure the top growth; they need warm weather to grow. They are closely related to potatoes and are similarly susceptible to blight disease outdoors.
Key plant attributes:
- Scientific name: Solanum lycopersicum
- Family: Nightshade (Solanaceae)
- Hardiness: Very tender; killed by frost
- Life cycle: Perennial grown as annual
- Growth habit: Determinate (bush) or indeterminate (vining)
- Light requirement: Full sun—6 hours minimum, 8–10 hours preferred
- Soil preference: Deep, fertile, well-drained, slightly acidic (pH 6.0–6.8)
- Nutrient needs: Heavy feeder
Growth Habits: Determinate vs. Indeterminate
Tomatoes generally have two different ways of growing. Cordon (or indeterminate) tomatoes are vigorous, fast-growing plants that get very tall and need suitably tall supports. As they grow vertically, they take up very little ground space, but do need regularly tying-in to supports and the removal of side shoots to grow and crop well. Bush (or determinate) tomatoes are naturally more compact plants, great for smaller spaces. Trailing types can even be grown in windowboxes and hanging baskets. These are the easiest type to grow and need little maintenance.
Days to Maturity and Climate Suitability
Tomatoes generally need about 100 days from seed to harvest, though exact timing depends on the variety and growing conditions. Early season cultivars mature 65 days or less from transplant. Main season plants reach maturity at 70-80 days from transplanting. Late season plants reach maturity 80 days or longer from transplanting, best for long growing season locations. The shortest period between sowing and opening of the first flower being 26 days and between opening of the first flower and ripening 33 days.
The Relationship Between Sunlight, Soil, and Plant Health
Tomatoes require a minimum of six hours of direct sun daily. They prefer daytime temperatures of 70 to 80°F and nighttime temps above 60°F. The relationship between sunlight exposure and sugar production is direct—more sunlight means more photosynthesis, which results in sweeter, more flavorful fruits. Tomatoes are heavy feeders that love slightly acidic (pH 6.2-6.8), fertile, loamy, well-draining soil. The relationship between soil health and plant vigor is direct—fertile soil produces healthy plants with abundant fruit.
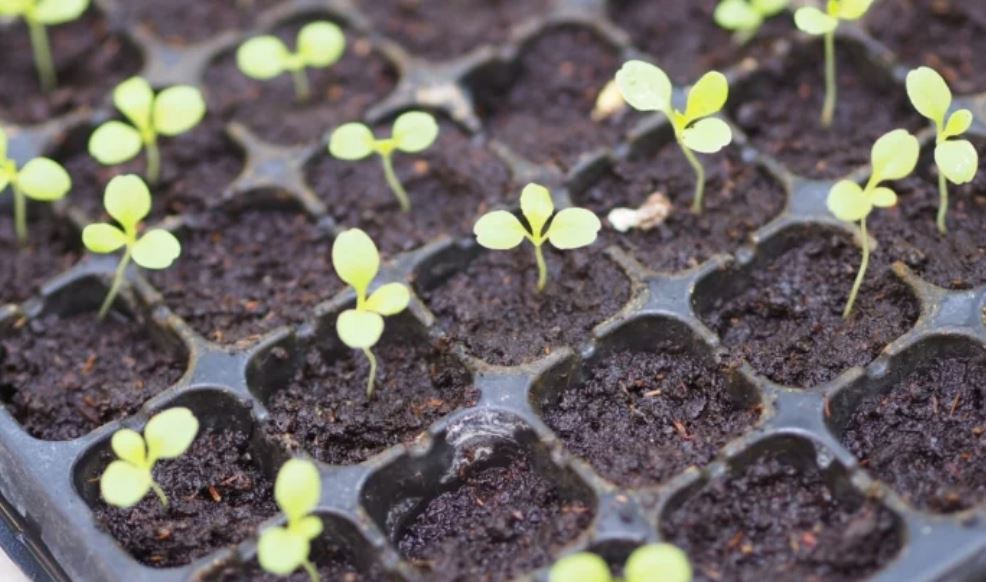
Starting Tomatoes from Seed
Starting your own plants from seed gives you more choices of which variety to grow.
When to Sow Seeds
Tomato seeds are best sown indoors about six weeks before your average last frost date. Sow seeds indoors 6 to 8 weeks before transplanting outside. If you’ll be growing your crop in a greenhouse, sow from late February to mid-March; if they’ll be outside, sow from late March to early April. Don’t start plants too early, and don’t rush to transplant.
Seed starting checklist:
- Sow 6–8 weeks before last frost date
- Use sterile, soilless seed-starting mix
- Plant seeds 1/8 to 1/4 inch deep
- Maintain 70–90°F for germination
- Provide 14–16 hours of bright light daily
- Use heat mat for faster germination
Seed Starting Materials
Use a sterile, soilless mix labeled for seed starting—never use garden soil, which often drains poorly and may harbor disease organisms. Tomato seeds can be started in just about any container, provided it has drainage holes at the bottom. Thoroughly moisten the seed-starting mix, then fill the containers to within 1/2 inch of the top. Warm temperatures (70-75°F) help speed up seed germination; place containers on a heat mat and cover with a humidity dome.
Germination and Early Growth
Seeds germinate best at 75°F to 90°F. Days to emergence: 6 to 12—about 1 week at 75°F. After germination, grow transplants at about 70°F. If you purchase transplants, look for sturdy, short, dark green plants. Avoid plants that are tall, leggy, or yellowish, or have started flowering. Transplants that are too mature often stall after transplanting while younger, smaller plants pass them by, producing earlier and more fruit.
Hardening Off Seedlings
Prepare transplants for the rigors of the outdoors by hardening-off over the course of a week, allowing for a gradual increase in sun and wind exposure each day. Harden off plants before transplanting by reducing water and fertilizer, not by exposing to cold temperatures, which can stress them and stunt growth. Transplants exposed to cold temperatures (60°F to 65°F day and 50°F to 60°F night) are more prone to catfacing.
Preparing the Garden for Planting
Proper soil preparation is the foundation of a successful tomato crop.
Soil Testing and pH Adjustment
Soil sampling prior to planting is the best way to know exactly what you will need for your tomatoes. Tomatoes do best in soil that is well drained and has good organic matter. The pH of the site should be between 6.0 and 6.8. Liming to increase pH will also add calcium and magnesium to the soil. If your pH is good but you need more calcium, you can apply gypsum (landplaster) at the rate of 1lb per 100 square feet.
Soil Preparation
Amend your soil with compost and a balanced vegetable fertilizer. Absent soil test recommendations, prepare the soil by working in 2-3 pounds per 100 square feet of a complete fertilizer (10-10-10). Work fertilizer into the top 6 inches of soil. More fertilizer or a high-nitrogen fertilizer is not recommended; it can result in luxuriant foliage but delayed flowering and fruiting.
Soil preparation checklist:
- Test soil pH; amend with lime (to raise) or sulfur (to lower) as needed
- Mix in 2–3 inches of compost or well-rotted manure
- Work soil to at least 8–10 inches deep
- Add balanced vegetable fertilizer according to soil test
- Ensure soil drains well to prevent root rot
Crop Rotation
Plant tomatoes in different spots from year to year to reduce soil-borne disease. To minimize disease problems, don’t plant tomatoes where they or another nightshade (eggplant, peppers, potatoes) have recently been planted. Avoid planting on soils that have recently grown tomatoes, potatoes, peppers or eggplant for at least two years.
Container Growing Considerations
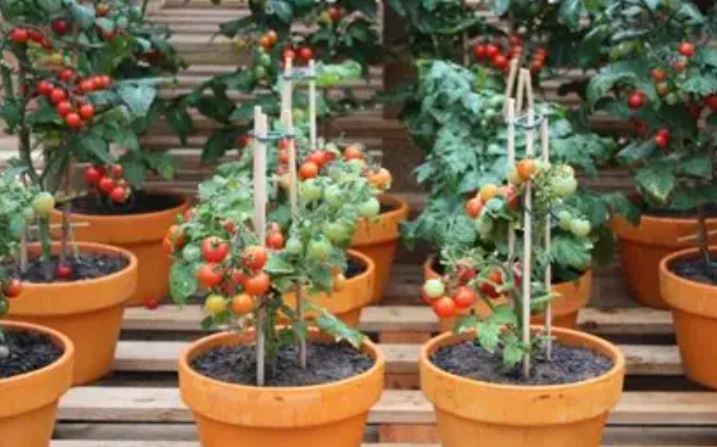
If you plant in a container that has been used before, clean the container and use new potting soil. Containers for indeterminates need to be at least 10 gallons and 18 inches deep. Choose determinate or compact varieties for easier container management.
Planting Tomato Seedlings
Proper transplanting technique sets the foundation for healthy root development and vigorous growth.
When to Plant Outdoors
Transplant after all danger of frost is past and when the soil has warmed. Warmer soil temperatures in late May and early June are perfect for tomato seedlings. Frost will kill them and blossom drop will occur if nighttime temperatures dip below 55°F or rise above 75°F. Wait at least a week or two after the last frost. Nighttime temperatures should be consistently above 45°F.
Planting Depth: The Key to Success
Tomatoes are unique in that any portion of the stem that touches the ground can root. If planted deeply, their root structure will increase. Remove the lower leaves and plant 5-6 inches deep. Set them in the ground so that the soil level is just below the lowest leaves. Roots will form along the buried stem, establishing a stronger root system. Bury the stem deep, up to the point where the topmost leaves begin.
Transplanting Technique
Horizontal or trench planting is a technique that takes advantage of higher soil temperatures near the surface. Place the roots and lower stem horizontally in a trench a few inches deep—this is a good planting method if your plants are leggy. It’s best to plant in the evening or on a cloudy day. Firm the soil so that there is good contact, create a well near the stem, then water thoroughly. Give your plants a boost by using a diluted liquid starter fertilizer that is high in phosphorus for strong root development.
Spacing Guidelines
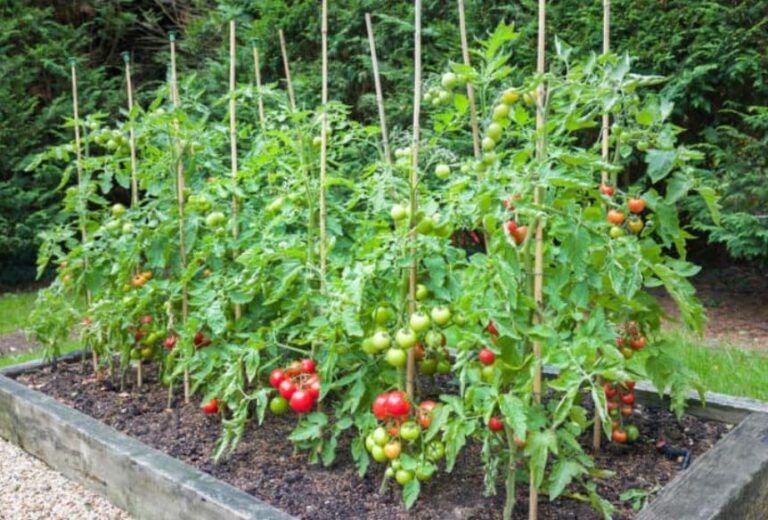
Space determinate varieties 2 feet apart; space indeterminate varieties 3 feet apart. More specifically: 12 to 24 inches apart for determinate varieties, 14 to 20 inches apart for staked indeterminate varieties, and 24 to 36 inches apart for unstaked indeterminate varieties. More space = better air circulation = less disease. Leave three to four feet between plants; maybe more if your plant is a big indeterminate.
Supporting Tomato Plants
Tomatoes need support to remain upright. Installing supports at planting time avoids damaging roots later.
Caging
Caging, staking and trellising are all methods employed to provide solid support. Determinate tomatoes require 2- or 3-foot tall supports, while indeterminate varieties should have supports around 5 feet tall. You can purchase pre-made cages or make your own from concrete reinforcement wire. Openings should be 6 inches square to allow for easy harvesting. Place the cages at planting time.
Staking
If you choose to use stakes, insert them 3-4 inches from the stem at planting. Stakes should be strong, at least 1½ inches in diameter, 6 feet tall and pounded 12 inches into the ground. Wooden tomato stakes are typically about 6 feet long and 1½ inch square. Drive stakes at least 8 to 10 inches deep at or soon after planting. Staked tomatoes can be planted a bit closer than caged ones, 18-24 inches apart.
Support method comparison:
- Caging: Less maintenance; good for sprawling plants; larger footprint; fruits smaller than staked
- Staking: Best for small spaces; needs regular tying; good air circulation; fruits larger
- Trellising: Efficient for rows; good air flow; more initial setup
- String method: Used in greenhouses; allows lowering as plants grow
Staking and Pruning Relationship
Staked plants must be pruned as they grow. At each leaf node along the main stem, suckers should be removed just above the first set of leaves. Keeping this first set of leaves increases photosynthesis and provides more foliage cover, reducing sunscald. Staking and pruning usually reduces total yield, but fruits will tend to be larger.
Support Considerations
Caged tomato fruits are smaller than those staked, and harvest is later. Staked and pruned plants are also more susceptible to blossom end rot and sunscald. Allowing indeterminate varieties to sprawl reduces labor, but takes up more space and plants are more prone to disease.
Watering Tomato Plants
Proper watering is one of the most critical aspects of tomato care.
The Deep Watering Principle
Tomatoes want deep watering 2-3 times per week, not light watering every day. When you water deeply, moisture penetrates 12-18 inches into the soil. This helps stimulate deep root growth. A deep soaking once a week is better than several light waterings. Slow, deep watering supports root development better than a light sprinkling of the soil surface.
Watering Frequency and Amount
A good gauge is to give each tomato plant between 1 and 2 inches of water each week. Tomatoes require 1-2 inches of water per week depending on rainfall. Young plants need frequent, lighter watering (about 1 to 2 inches of water per week) as their roots establish, with the soil kept consistently moist. Mature plants benefit from watering 2 to 3 times a week.
Watering Methods and Timing
Water tomatoes at their base, slowly and deeply. Water from the base of the plant to avoid getting the leaves wet—this will help prevent disease. Water regularly and deeply as the tomatoes develop (no less than once a week, more if it’s hot or your soil is sandy) but don’t allow the soil to become soggy, only moist. Morning watering allows foliage to dry quickly.
Adjusting for Weather and Growth Stage
Hot weather, sandy soil, containers, and wind all increase water needs. Containers, especially in hot inland areas, may need to be watered up to twice a day at the height of summer. After you see tiny tomatoes peeking out (fruit set), water less—poke your finger in the soil 2 to 3 inches down. If it is dry at 2 inches, water. Uniformity in soil moisture (not too wet and not too dry) is critical to help reduce blossom end rot (BER) on tomatoes.
Fertilizing Tomato Plants
Tomatoes are heavy feeders that require regular nutrition throughout the growing season.
Understanding NPK Requirements
Fertilizer labels list three numbers: N‑P‑K. Those are percent by weight of N, P2O5, and K2O. Higher first number = more nitrogen; middle = phosphorus; last = potassium. Tomatoes prefer a fertilizer low in nitrogen, high in phosphorus, and medium to high in potassium. During flowering and fruiting, reduce N and raise P and K to favor set, size, and flavor.
Fertilizer by Growth Stage
At transplant, use a starter fertilizer that is high in phosphorus for strong root development—something like 5-10-5. These starter solutions help promote root growth without causing excessive vegetative growth above ground. Absent soil test recommendations, prepare the soil by working in 2-3 pounds per 100 square feet of a complete fertilizer (10-10-10).
Application Timing
Start with a complete fertilizer incorporated into the beds. Once you have fruit that are about the size of a quarter, you should make another fertilizer application. Side-dress after first fruits appear. Additional fertilizer may be needed depending on plant growth, fruit load, and soil fertility.
What to Avoid
Do not add Epsom salts (magnesium sulfate) to the soil unless soil testing shows a magnesium deficiency. More fertilizer or a high-nitrogen fertilizer is not recommended; it can result in luxuriant foliage but delayed flowering and fruiting. Excessive nitrogen promotes lush foliage at the expense of fruit.
Pruning Tomato Plants
Pruning directs energy into fruit production and improves air circulation.
Pruning Determinate Tomatoes
For determinate types, don’t bother pruning—it will only reduce your harvest. If you prune all the suckers on a determinate type, you will have a short plant with few fruit. Determinate tomatoes do not need to be pruned, though you can remove growth at the base of the plant that would trail on the ground. Only minimal pruning should be done on determinate tomatoes because this type sets a fixed amount of fruit.
Pruning Indeterminate Tomatoes
Cordon or indeterminate tomato varieties are vigorous plants that must be pruned by a technique usually referred to as sideshooting, in combination with training the main stem on a support so plants grow upright. Pruning indeterminate tomatoes improves fruit production by removing extra growth that diverts energy away from developing fruits. Prune indeterminate tomatoes at least every couple of weeks, preferably more often, as new suckers appear on the plant.
Pruning guidelines:
- Determinate: Remove only dead or diseased leaves; do not prune branches or suckers
- Indeterminate: Remove suckers regularly to direct energy into main stems and larger fruits
- Timing: Prune indeterminate tomatoes early and often throughout the season
- Goal: Improve air circulation, reduce disease, increase fruit size
- Stop: Continue to prune until about four weeks before the first expected frost
How to Remove Suckers
For indeterminate types, allow one, two, or three suckers to grow from the base of the plant. A commonly recommended pruning strategy for determinate tomatoes is to remove all of the suckers below the first fruit cluster. At each leaf node along the main stem, suckers should be removed just above the first set of leaves.
Pruning Benefits and Trade-offs
Staking and pruning can hasten first harvest by a week or more, improve fruit quality, keep fruit cleaner, and make harvest easier. Staking and pruning usually reduces total yield, but fruits will tend to be larger. Staked and pruned plants are also more susceptible to blossom end rot and sunscald.
Common Pests and Diseases
Early identification and prevention are key to protecting your tomato crop.
Common Pests
Tomatoes are exceptionally susceptible to a range of formidable pests, including aphids, leafminers, mealybugs, caterpillars, plant bugs, spider mites and other pest mites, thrips, and whiteflies. Aphids are small insects that cluster on new growth and undersides of leaves. Tomato hornworms are large green caterpillars that can defoliate plants rapidly. Whiteflies are tiny white insects that flutter from disturbed foliage.
Common Diseases
Early blight causes dark spots on lower leaves that enlarge and cause leaf drop. Late blight is a devastating fungal disease that thrives in wet conditions. Blossom end rot (BER) appears as dark spots on the bottom of fruits. It is due to a calcium deficiency. However, it can occur in soils with plenty of calcium. The main problem is water.
Disease Prevention Strategies
To minimize disease problems, don’t plant tomatoes where they or another nightshade have recently been planted. Rotate crops—avoid planting tomatoes in the same spot for at least two years. Water at the base of plants to keep foliage dry. Provide good air circulation through proper spacing and pruning. Remove and destroy diseased foliage promptly. Mulch plants after the soil has warmed up to maintain soil moisture and suppress weeds.
Disease and pest prevention checklist:
- Select disease-resistant varieties
- Practice crop rotation (3+ years between nightshades)
- Water at base, avoiding wet foliage
- Ensure good air circulation with proper spacing
- Remove and destroy diseased foliage
- Maintain even soil moisture to prevent blossom end rot
- Use organic controls when needed
Blossom End Rot Prevention
Blossom-end rot is induced more often when there is drought stress followed by excessive soil moisture; these fluctuations reduce uptake and movement of available calcium. To avoid this problem, maintain good soil moisture and remember that a plant that is full of tomatoes will require more water than a plant without any fruit.
Harvesting and Storing Tomatoes
Knowing when and how to harvest tomatoes ensures you enjoy them at their peak flavor.
When to Harvest
Tomatoes are ready to harvest when they have reached full color and are slightly soft to the touch. Tomatoes are ripe when they give slightly at a light squeeze; tomatoes that feel soft are overripe. During the peak of growing season, harvest tomatoes a couple of times per week. Tomatoes that are allowed to ripen on the vine may be yellowish/orange in extreme heat.
Harvesting Technique
Regular harvesting encourages the plant to continue producing fruit. Use clean pruners or scissors to cut fruits from the vine, leaving a small stem attached. Harvest in the morning when fruits are cool and firm. Check plants daily during peak production—tomatoes can go from ripe to overripe quickly.
Storing Ripe Tomatoes
Ripe tomatoes should be stored in the refrigerator and used within a week of harvest. Once fully ripe, refrigerate and use within 2-3 days. Once they are ripe, never place your tomatoes in the fridge as the cold storage temperatures will mute their flavor and make them mushy. For best flavor, store at room temperature (55–70°F) and use within a few days.
Ripening Green Tomatoes
Unripe tomatoes that are slightly pink should be stored in indirect light or in a paper bag to ripen. When harvesting less ripe but full-size fruit late in the season, pick them and store at 70°F to ripen. As they become pink, move them to cooler temperatures (55°F) and then to the refrigerator when fully ripe. Store harvested tomatoes in a cool, dark area around 50°F for the best flavor development. That will last from 1 to 2 months.
Frequently Asked Questions About Growing Tomatoes
1. How long does it take to grow tomatoes?
Tomato plants generally need about 100 days from seed to harvest, though exact timing depends on the variety and growing conditions. The process includes five to 10 days for germination, several weeks for seedling development, and about 50 to 60 days after transplanting to produce ripe fruit. Some very early cultivars are harvested less than 50 days from when they’re transplanted. Days to maturity range from 55 to 90 days from transplant, depending on the variety.
2. Why are my tomato leaves turning yellow?
Yellowing leaves can indicate several problems. Underwatering or overwatering both cause yellowing. Nitrogen deficiency causes older leaves to yellow first. Magnesium deficiency shows as yellowing between leaf veins (interveinal chlorosis). Diseases like early blight also cause yellowing. Check soil moisture, fertilization, and look for other symptoms to diagnose the specific cause.
3. How do I prevent blossom end rot?
Blossom end rot appears as dark spots on the bottom of fruits. It is due to a calcium deficiency. However, it can occur in soils with plenty of calcium. The main problem is water. Blossom-end rot is induced more often when there is drought stress followed by excessive soil moisture; these fluctuations reduce uptake and movement of available calcium. To avoid this problem, maintain good soil moisture.
4. Do I need to prune my tomato plants?
It depends on the growth habit. Determinate (bush) tomatoes should not be pruned—it reduces yield. Remove only dead or diseased leaves. Indeterminate (vining) tomatoes benefit from pruning suckers to direct energy into fruit production and improve air circulation. Prune indeterminate tomatoes at least every couple of weeks as new suckers appear.
5. How many tomato plants should I grow?
A single cherry tomato plant is usually sufficient for a family. For a family of four, 3–5 tomato plants typically provide enough fresh tomatoes for regular use, with surplus for preserving. Approximate yield: 15 to 45 lbs per 10-foot row. Start with 2–3 plants of 2–3 different varieties to find your favorites.
6. Can I grow tomatoes in containers?
Yes, many tomatoes grow well in containers. Choose determinate or compact varieties for easier management. Containers for indeterminates need to be at least 10 gallons and 18 inches deep. Use a container that is 18–20 inches wide and at least 2 feet deep. Tomatoes need 6–8+ hours of direct sun. Container-grown plants need more frequent watering and regular fertilization.
Complete Tomato Growing Guide Table
| Stage | Action | Timing | Key Details |
|---|---|---|---|
| Seed Starting | Sow seeds indoors | 6–8 weeks before last frost | 1/8 inch deep; 75–90°F; 6–12 days to emerge |
| Hardening Off | Gradual outdoor exposure | 1 week before transplanting | Increase sun and wind exposure daily |
| Soil Preparation | Amend soil with compost and fertilizer | Before planting | pH 6.0–6.8; work into top 6 inches |
| Transplanting | Move seedlings outdoors | After frost; soil above 60°F | Plant 5–6 inches deep; bury stem |
| Spacing | Determinate: 2 ft apart | At planting | Indeterminate: 3 ft apart |
| Support | Install stakes/cages | At planting | Stakes: 6 ft tall; cages: 5 ft for indeterminates |
| Watering | Deep watering | 2–3 times per week | 1–2 inches per week; 12–18 inches deep |
| Fertilizing | Starter at transplant | At planting | High phosphorus (5-10-5) |
| Fertilizing | Side-dress | After first fruits appear | Complete or tomato-specific fertilizer |
| Pruning | Determinate: no pruning | Throughout season | Remove only dead/diseased leaves |
| Pruning | Indeterminate: remove suckers | Throughout season | Remove as they form along main stem |
| Pest Control | Monitor and treat | Throughout season | Organic controls; beneficial insects |
| Disease Prevention | Good air circulation; crop rotation | Throughout season | Water at base; remove diseased foliage |
| Harvesting | Pick when full color and slightly soft | As fruits ripen | Gently twist or cut from vine |
| Storing | Ripe: refrigerate | Within a week | Unripe: ripen at 70°F in paper bag |
Final Verdict: Growing Your Best Tomatoes
Growing tomatoes is a rewarding journey that combines science, art, and patience. The key to success lies in understanding the fundamental relationships that govern tomato growth: the connection between sunlight and flavor, between soil health and plant vigor, between consistent watering and fruit quality. Start with varieties suited to your climate and culinary preferences—cherry tomatoes are perfect for beginners, while heirlooms reward experienced gardeners with unmatched flavor.
Prepare your soil thoroughly, plant deeply, water consistently but not excessively, feed regularly with the right nutrients at the right time, and provide sturdy support for your vines. Monitor for pests and diseases, and take action early. Harvest at peak ripeness and store properly to enjoy the fruits of your labor. Whether you have a sprawling garden or a small balcony container, tomatoes will reward your efforts with an abundant harvest of flavorful, homegrown fruit that no store-bought tomato can match. Start small, learn from each season, and soon you will be growing the best tomatoes you have ever tasted.
- Plant Parts Labelled: Learn Root, Stem, Leaf, Flower, Fruit, and Seed - July 12, 2026
- Metal Plant Labels: The Complete Guide to Durable Garden Plant Markers - July 12, 2026
- Garden Shovel Crossword Clue: Spade, Trowel, or Shovel? - July 11, 2026