I have personally tested dozens of crops in containers. Some are a frustrating waste of time (skip the giant heirloom pumpkins). Others are incredibly rewarding. Here are the top 30 vegetables, ranked and grouped for your bucket gardening success.
The Heavy Hitters (High Yield, Easy Growth)
1. Cherry Tomatoes (Determinate Varieties)
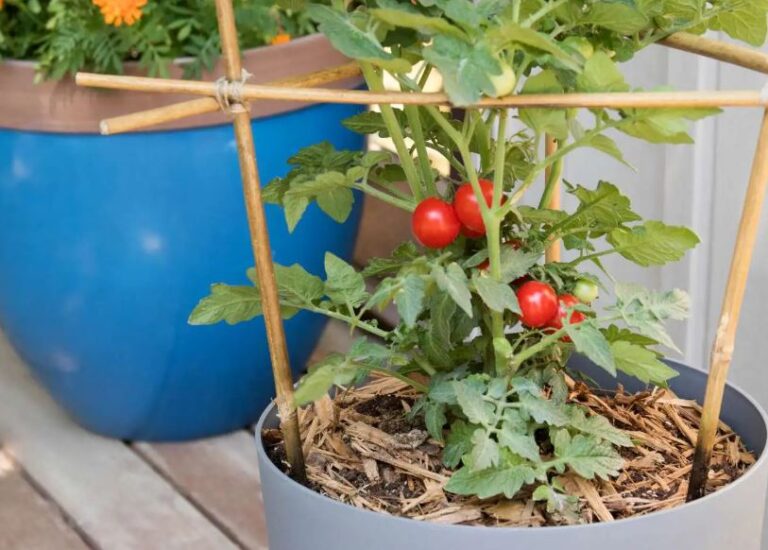
If you only grow one thing, grow cherry tomatoes. Look for “determinate” or “patio” varieties. These are genetically programmed to grow to a bushy, compact size (usually 3 to 4 feet) rather than vining endlessly.
-
Bucket Size: 5-gallon minimum.
-
My Tip: Bury the stem! When you plant the seedling, bury it up to its top few leaves. The buried stem will grow extra roots, creating a massive, resilient root system.
2. Bush Beans
I adore bush beans. Unlike pole beans, they don’t need a trellis to climb. They grow into beautiful, 2-foot-tall compact bushes and produce heavily over a few weeks. Better yet, they pull nitrogen from the air and add it to the soil.
-
Bucket Size: 3 to 5-gallon bucket. You can fit 3 to 4 bean plants in a single 5-gallon bucket.
-
My Tip: Plant a new bucket of beans every three weeks for a continuous harvest all summer long.
3. Radishes
The ultimate instant-gratification crop. From dropping a seed in the dirt to eating a spicy, crunchy radish takes about 25 to 30 days. They have very shallow root systems, making them perfect for buckets.
-
Bucket Size: 2 to 3-gallon buckets (shallow is fine).
-
My Tip: Radishes hate the heat. Grow them in early spring and late fall. If you grow them in July, they will turn woody and incredibly bitter.
4. Leaf Lettuce
Heading lettuces (like Iceberg) are tricky in containers. Loose-leaf lettuces (like Buttercrunch, Oakleaf, or Mesclun mixes) are a dream. You just snip off the outer leaves with scissors, and the center of the plant keeps growing.
-
Bucket Size: 2-gallon shallow bucket or window box.
-
My Tip: Lettuce actually appreciates a little shade. If your patio gets blistering afternoon sun, tuck your lettuce bucket behind a taller tomato bucket.
5. Hot Peppers (Jalapeños, Habaneros, Thai Chilies)
Hot peppers thrive in buckets because they absolutely love heat. The plastic of the bucket warms the soil faster than the ground, creating the perfect microclimate for spicy peppers. A single Jalapeño plant in a bucket can yield 40+ peppers.
-
Bucket Size: 3 to 5-gallon bucket. (One plant per bucket).
-
My Tip: Don’t overwater them. Peppers produce more capsaicin (the chemical that makes them spicy) when they are slightly water-stressed.
The Root Cellar (Deep Buckets Required)
Root vegetables are fantastic for buckets because the loose, fluffy potting mix allows the roots to expand perfectly without hitting rocks or hard clay.
6. Carrots
You can grow perfect, straight carrots in buckets. The key is choosing the right variety. Skip the massive “Imperator” carrots and look for shorter, stubbier varieties like “Danvers,” “Chantenay,” or “Paris Market.”
-
Bucket Size: 5-gallon bucket (you need the 14-inch depth).
-
My Tip: Carrot seeds are microscopic and take up to 21 days to germinate. Keep the surface of the bucket soil consistently damp until you see the green shoots emerge.
7. Potatoes
Growing potatoes in buckets is incredibly fun, especially when it’s time to harvest. You simply dump the bucket over and sift through the dirt for hidden treasure.
-
Bucket Size: 5 to 7-gallon bucket.
-
My Tip: Put 4 inches of soil at the bottom, place your seed potatoes in, and cover them with 2 inches of soil. As the green stem grows up, keep adding soil around the stem until the bucket is full. This forces the plant to produce potatoes all the way up the bucket!
8. Beets
Beets are a two-for-one crop. You can harvest the young green leaves for salads, and then harvest the sweet, earthy root a month later.
-
Bucket Size: 3 to 5-gallon bucket. You can fit about 6 to 8 beets in a standard 5-gallon bucket.
-
My Tip: Beet seeds are actually clusters of multiple seeds. When they sprout, you will often get two or three seedlings in one spot. You must thin them out (snip the weakest ones with scissors) so only one remains, or the roots won’t have room to form.
9. Turnips
Similar to beets, you get both greens and roots. They grow very fast and prefer the cool weather of spring or fall.
-
Bucket Size: 5-gallon bucket.
-
My Tip: Harvest them when they are small (the size of a golf ball). If you let them get massive, they become tough and woody.
10. Sweet Potatoes
Sweet potatoes are sprawling vines that look beautiful cascading over the side of a bucket. They need a long, hot summer to produce tubers.
-
Bucket Size: 5 to 10-gallon bucket. The bigger, the better.
-
My Tip: Do not plant these in cold soil. Wait until the weather is consistently hot, and use a dark-colored bucket to absorb maximum solar heat.
The Leafy Greens (Cut-and-Come-Again)
Greens are incredibly space-efficient. Because you harvest the leaves and let the plant keep growing, a few buckets of greens can provide daily salads for months.
11. Spinach
Spinach is a nutrient powerhouse that grows effortlessly in buckets, provided the weather is cool.
-
Bucket Size: 2 to 3-gallon bucket.
-
My Tip: The moment the weather hits 80°F (27°C), spinach will “bolt” (shoot up a tall flower stalk and turn instantly bitter). Harvest heavily in the spring and try planting again in late September.
12. Swiss Chard
If I had to pick the most beautiful vegetable to grow in a bucket, it is “Bright Lights” Swiss Chard. The stems are vibrant neon pink, yellow, and orange. It is also incredibly heat-tolerant, surviving summers that would kill spinach.
-
Bucket Size: 3-gallon bucket.
-
My Tip: Harvest the outer leaves by cutting them at the base of the stem. The plant will look like a palm tree as it continues to grow from the top center.
13. Kale
Kale is indestructible. It survives intense heat, and it actually tastes sweeter after a frost. A single bucket with one or two kale plants will yield greens for 8 months out of the year.
-
Bucket Size: 5-gallon bucket (they can get quite large).
-
My Tip: Watch out for the Cabbage White Butterfly. They lay eggs on kale leaves, which hatch into green caterpillars that will devour your plant in days. Pick them off by hand.
14. Arugula
Spicy, peppery, and fast-growing. Arugula is a brilliant bucket crop that adds incredible flavor to boring salads.
-
Bucket Size: 2-gallon bucket.
-
My Tip: Like radishes, arugula gets extremely spicy and bolts quickly in the summer heat. Grow it in the shoulder seasons (spring and fall).
15. Mustard Greens
If you like a real kick, mustard greens are intensely flavorful and grow beautifully in containers.
-
Bucket Size: 3-gallon bucket.
-
My Tip: Mix mustard greens into your lettuce buckets for a varied, textural salad mix.
The Vine & Stalk Crops (Going Vertical)
You can grow large vining crops in buckets, but you must manage their vertical space.
16. Cucumbers (Bush Varieties)
Traditional vining cucumbers will quickly outgrow a bucket and take over your patio. You must look for “Bush” or “Patio” varieties (like ‘Spacemaster’ or ‘Bush Slicer’).
-
Bucket Size: 5-gallon bucket (one plant per bucket).
-
My Tip: Even bush varieties benefit from a small tomato cage or trellis placed inside the bucket. Keeping the cucumbers off the wet soil prevents them from rotting.
17. Zucchini (Summer Squash)
Zucchini plants are notorious space-hogs. However, compact bush varieties (like ‘Astia’ or ‘Patio Star’) are bred specifically for containers.
-
Bucket Size: 5 to 7-gallon bucket (Minimum one 5-gallon bucket per plant).
-
My Tip: Zucchini requires bees to move pollen from the male flower to the female flower. If you are growing on a high-rise balcony where bees are scarce, you may need to hand-pollinate them using a Q-tip.
18. Peas (Snow and Snap Peas)
Peas are the candy of the garden. They thrive in cold spring weather and vine beautifully up a simple trellis.
-
Bucket Size: 5-gallon bucket. You can plant a circle of 6 to 8 pea seeds around the perimeter of the bucket.
-
My Tip: Push a few bamboo stakes into the bucket and tie them together at the top to form a teepee. The peas will climb the teepee naturally.
19. Bell Peppers
While hot peppers are prolific, bell peppers are a bit more finicky but entirely doable in a bucket.
-
Bucket Size: 5-gallon bucket.
-
My Tip: Bell peppers have brittle branches. When the bucket gets top-heavy with heavy fruit, a strong wind can snap the plant in half. Stake the main stem early on.
20. Eggplant
Eggplants are stunning ornamental plants with large purple flowers and striking dark fruit. They require massive amounts of heat and consistent moisture.
-
Bucket Size: 5-gallon bucket. Look for smaller varieties like ‘Patio Baby’ or ‘Fairy Tale’.
-
My Tip: Eggplants are heavy feeders. Once the flowers appear, you must hit them with liquid fertilizer every two weeks or the fruit will stay tiny.
The Aromatics & Alliums
These plants take up very little space but provide the foundational flavors for cooking.
21. Green Onions (Scallions)
Scallions are incredibly easy. They have shallow roots and take up almost zero horizontal space.
-
Bucket Size: 1 to 2-gallon bucket.
-
My Tip: You can literally pack 20 to 30 scallions into a single bucket. Just scatter the seeds on the surface and cover lightly with soil.
22. Garlic
Garlic is planted in the fall, sleeps through the winter, and is harvested in the middle of summer. It is the ultimate hands-off crop.
-
Bucket Size: 5-gallon bucket. You can fit about 6 to 8 cloves in one bucket.
-
My Tip: Break apart a garlic bulb, and plant the individual cloves pointy-side up, about 2 inches deep.
23. Celery
Celery requires ridiculous amounts of water. In the ground, it’s hard to keep it moist enough. In a bucket, you can control the moisture perfectly.
-
Bucket Size: 3 to 5-gallon bucket.
-
My Tip: Celery is a “cut-and-come-again” plant. You don’t have to harvest the whole head; just snap off the outer stalks as you need them for cooking.
The Brassicas (The Cabbage Family)
These are heavy, large plants. You can only fit one per bucket, but they are incredibly rewarding cool-season crops.
24. Broccoli
Broccoli grows a massive footprint of leaves just to produce one main crown.
-
Bucket Size: 5-gallon bucket (Strictly one plant per bucket).
-
My Tip: After you cut the main broccoli crown, do not pull the plant! Leave it in the bucket. Over the next few weeks, it will push out dozens of smaller “side shoots” that are tender and delicious.
25. Cabbage (Mini Varieties)
A standard cabbage can grow 3 feet wide. For buckets, you must seek out mini or “pixie” varieties (like ‘Caraflex’ or ‘Gonzales’) that produce perfectly round, 2-pound personal cabbages.
-
Bucket Size: 5-gallon bucket.
-
My Tip: Cabbages are heavy drinkers. If the soil dries out and then you suddenly flood it with water, the cabbage head will literally split open from the pressure. Water consistently.
26. Cauliflower
Cauliflower is the diva of the garden. It demands perfect temperatures (not too hot, not too cold) and consistent water.
-
Bucket Size: 5-gallon bucket.
-
My Tip: When the white cauliflower head is about the size of a tennis ball, take the large outer leaves and tie them together over the head with a rubber band. This is called “blanching” and prevents the sun from turning the white head a bitter yellow color.
27. Bok Choy (Pak Choi)
An Asian green that is fast, crisp, and thrives in cool weather.
-
Bucket Size: 3-gallon bucket.
-
My Tip: Bok Choy is highly susceptible to flea beetles, which shoot tiny holes in the leaves. Cover the bucket with a lightweight insect netting to keep them pristine.
28. Kohlrabi
It looks like an alien spaceship, but it tastes like a sweet, crisp apple crossed with a mild radish. The bulb grows above the soil line, making it fascinating to watch.
-
Bucket Size: 5-gallon bucket (you can fit 3 to 4 plants in one bucket).
-
My Tip: Harvest when the bulb is the size of a baseball. If they get too big, the inside becomes woody and fibrous.
The Specialty/Niche Crops
29. Okra (Dwarf Varieties)
Standard okra plants grow 8 feet tall and look like trees. Dwarf varieties (like ‘Little Lucy’ or ‘Jambalaya’) stay around 3 to 4 feet and are perfect for hot, southern bucket gardens.
-
Bucket Size: 5-gallon bucket.
-
My Tip: Okra grows incredibly fast. A pod can go from perfect to woody and inedible in 48 hours. Check the bucket every single day once it starts fruiting.
30. Patio Tomatoes (Micro-Dwarfs)
If a 5-gallon bucket is still too big for you, look into “Micro-Dwarf” tomatoes (like ‘Orange Hat’ or ‘Micro Tom’). These are genetically tiny tomato plants that grow no taller than 12 inches but produce dozens of tiny, sweet cherry tomatoes.
-
Bucket Size: 1-gallon bucket or a large coffee can!
-
My Tip: These are perfect for bright indoor windowsills or the railing of a tiny apartment balcony.
The Secret to Long-Term Bucket Success
When you reach the end of the season, your bucket soil will be completely exhausted of nutrients, and it will be filled with a dense mat of old roots. Do you have to throw it away? Absolutely not. Good potting soil is expensive.
Here is my end-of-season bucket protocol:
-
Dump it out: Empty all your buckets onto a tarp or into a wheelbarrow.
-
Remove the roots: Pull out the old main root balls and stems and throw them in the compost.
-
Recharge the soil: Add about 30% fresh, high-quality compost to the old soil. Add a few cups of organic slow-release fertilizer (like worm castings or an all-purpose granular mix).
-
Mix and Refill: Mix it thoroughly and put it back into your buckets. Your soil is now recharged, fluffy, and ready for next spring.
Growing food in buckets is not a compromise; it is a highly controlled, highly efficient method of urban farming. You control the soil, you control the moisture, and if a storm comes, you can physically move your farm into the garage.
Get a bucket. Drill some holes. Fill it with good soil. I promise you, the first time you eat a tomato that you grew on a concrete slab, you will never look at a grocery store vegetable the same way again.
I am so glad you asked. Making your own potting mix is the single biggest upgrade you can make to your container garden.
When you buy cheap bagged soil from the hardware store, you are often buying heavy, compacted filler that holds too much water and suffocates roots. By mixing it yourself, you gain total control over the texture, drainage, and nutrient profile—and if you are filling multiple 5-gallon buckets, making it in bulk will save you a ton of money.
Let’s break down the ultimate, foolproof DIY potting mix recipe.
The “Holy Trinity” Recipe (The 1-1-1 Mix)
The best potting soil isn’t actually “soil” at all. It is a soilless medium engineered for the specific physics of a container. The gold standard recipe used by professional nurseries is incredibly simple: equal parts (by volume) of three specific ingredients.
-
1 Part Peat Moss (or Coco Coir): This provides the bulk. It holds onto moisture like a sponge so your buckets don’t dry out immediately in the sun, while remaining incredibly lightweight. Note: I prefer Coco Coir as it is a more sustainable, renewable resource than peat.
-
1 Part Perlite (or Vermiculite): These are the little white, lightweight rocks you see in commercial mixes. Perlite is super-heated volcanic glass. It prevents compaction and creates microscopic air pockets in the mix so the roots can breathe and water can drain rapidly.
-
1 Part High-Quality Compost: This is the food. Coco coir and perlite are sterile and contain zero nutrients. Compost (or worm castings) provides the biological life, microbes, and foundational nutrients your vegetables need to grow.
To figure out exactly how much of each ingredient you need to buy based on the number of buckets you are filling, try playing with this calculator:
The Step-by-Step Mixing Guide
Making the mix is easy, but it can be dusty. I highly recommend wearing a basic dust mask (especially when pouring the perlite) and doing this outside.
Once you have your perfect, fluffy mix, scoop it right into your buckets, plant your seedlings, and watch them take off!

- How to Grow Microgreens Without Soil Indoors: Easy Home Method - October 5, 2026
- Microgreens vs. Sprouts: Key Differences, Nutrition, Safety, and Which One to Eat - October 5, 2026
- 10 Best Garden Tools For Weed Removal 2027 - October 3, 2026