I first crammed a half-dozen oversized heirloom tomato plants into flimsy plastic window boxes on a tiny, wind-swept apartment balcony, I thought I was practicing urban homesteading. Two weeks later, after a sudden July heatwave, my plants were a crispy, wilted mess. The soil had baked into a solid brick, the roots were strangled in circles, and I was left staring at a puddle of muddy water that refused to drain.
I almost quit right then and there. I assumed that if you didn’t have a sprawling backyard with rich, dark earth tilled into neat rows, growing your own food was an exercise in frustration.
Thankfully, I was wrong.
The turning point came when I stopped trying to force traditional garden rules onto confined spaces and instead learned how containers actually operate. Once I understood that yes, you can absolutely grow almost any vegetable in pots, provided you respect their physical and biological boundaries, everything changed. Today, I harvest pounds of crisp greens, sweet cherry tomatoes, crunchy radishes, and sharp peppers right outside my back door—and on patios, decks, and windowsills with zero traditional yard space.
If you are wondering whether container vegetable gardening is worth your time, or if you have tried and failed before like I did, this guide is everything I wish someone had handed me years ago. Let’s break down how to do it right.
Why Container Gardening Works (And Where People Go Wrong)
At its core, container gardening is entirely self-contained. That is both its greatest strength and its primary trap.
When a plant grows in the open ground, its roots can travel feet downward and sideways searching for moisture and mineral pockets. If it misses a day of rain, the earth buffers the shock. If it needs a heavy hit of nitrogen, microscopic networks and deep soil layers supply it.
In a pot, the plant is entirely dependent on you. There is no backup reservoir.
-
The soil volume is finite.
-
Nutrients wash out every time you water.
-
Temperatures swing faster because the sun hits the sides of the pot directly.
Once I accepted these parameters, container growing stopped being a guessing game and became a science I could manage. When you match the right container size, use a fluffy soilless mix instead of yard dirt, and keep up with a steady routine of water and feeding, your potted vegetables will often outperform garden-bed crops because you have eliminated weeds, soil-borne pests, and competition.
Choosing the Right Containers: Material, Size, and Drainage Decoded
The first mistake most beginners make is grabbing whatever container looks pretty without checking its dimensions or structural integrity. I have killed many plants in gorgeous, un-drained decorative pots.
1. The Non-Negotiable Rule: Drainage Holes
Never, under any circumstances, plant vegetables in a pot without drainage holes. People often ask if they can put a layer of gravel or broken pottery at the bottom of a solid pot to create artificial drainage. Do not do this. Physics creates a “perched water table” above that gravel layer, actually keeping the soil wetter and closer to the roots, which invites root rot. If your pot doesn’t have holes, drill them.
2. Container Materials Compared
-
Fabric Smart Pots (Aeration Fabrics): These are my absolute go-to for almost all vegetables. Made of porous geotextile fabric, they “air-prune” roots when they reach the edge, preventing root-binding. They also provide incredible oxygen exchange for root systems and never allow water-logging.
-
Plastic Containers: Lightweight, inexpensive, and retain moisture much longer than porous pots. Excellent for thirsty crops like leafy greens, spinach, and bok choy. Ensure they are food-safe (look for recycle codes 2, 4, or 5).
-
Terracotta and Clay: Beautiful and classic, but highly porous. They wick moisture out through the walls rapidly, meaning you will need to water twice a day in peak summer. Great for Mediterranean herbs or radishes, but tough on moisture-hungry vegetables.
-
Glazed Ceramic & Stone: Heavy, durable, and gorgeous. They retain moisture well, but their weight makes them nearly impossible to move once filled with wet soil—choose their final location before filling them.
3. Container Size Matrix for Common Vegetables
Size dictates root space, which dictates top growth. If your container is too small, the plant will stunt, dry out instantly, and yield almost nothing.
| Vegetable Crop | Minimum Container Volume / Depth | Recommended Pot Type |
| Leafy Greens (Lettuce, Spinach, Arugula) | 1 to 2 Gallons (6–8 inches deep) | Shallow window boxes, wide bowls, plastic tubs |
| Radishes & Green Onions | 1 Gallon (6 inches deep) | Rectangular planter boxes or low troughs |
| Bush Beans & Peas | 3 to 5 Gallons (10–12 inches deep) | 12-inch round pots or fabric bags |
| Peppers & Eggplants | 3 to 5 Gallons (12–14 inches deep) | Sturdy plastic pots or fabric containers |
| Full-Size & Cherry Tomatoes | 5 to 10 Gallons (18–24 inches deep) | Large 5-gallon buckets (with drilled holes) or large fabric bags |
| Cucumbers & Summer Squash | 5 to 7 Gallons (12–18 inches deep) | Large tubs or stock tanks |
The Soil Secret: Why Regular Yard Dirt Fails in Pots
Early on, I tried saving money by shoveling rich-looking dirt straight from my backyard garden bed into a large patio container. Within a week, after a few rounds of watering, that soil compressed into something resembling concrete. Water pooled on top, air couldn’t reach the roots, and my seedlings suffocated.
Container plants require a soil-less potting mix, never native garden soil.
A proper potting mix is fluffy, lightweight, sterile, and designed to drain freely while holding onto just enough moisture. Over the years, I have stopped buying expensive pre-mixed bags and started blending my own based on a simple, foolproof ratio:
-
40% Coconut Coir or Sphagnum Peat Moss: Acts as the moisture sponge, keeping hydration stable. Coir is my preferred sustainable choice over peat moss.
-
40% Perlite or Medium Vermiculite: Creates microscopic air pockets throughout the mix, ensuring roots get oxygen and excess water shoots straight through the drainage holes.
-
20% Aged Compost or Worm Castings: Introduces rich organic matter, beneficial microbes, and a gentle, slow-release foundation of natural nutrition.
Sunlight and Location: Engineering the Perfect Microclimate
Plants are solar panels. If they don’t get enough light, they turn pale, stretch thin, and fail to produce flowers or fruit.
When choosing where to place your pots, evaluate your light exposure carefully:
-
Full Sun (6 to 8+ Hours of Direct Sunlight): Non-negotiable for anything that flowers and fruits. If you want tomatoes, peppers, beans, cucumbers, or squash, they must sit in a spot that bakes in direct sunlight for the majority of the day. South- and west-facing balconies or patios are prime real estate.
-
Partial Sun / Partial Shade (4 to 6 Hours): Ideal for leafy greens (lettuce, spinach, kale, Swiss chard) and root crops like radishes and carrots. If you have an east-facing balcony that catches morning sun and afternoon shade, plant your salad greens there; they will thank you by staying tender and sweet instead of bolting into bitter seed heads.
Managing Balcony Microclimates
Living in an apartment or urban setting introduces unique challenges. Concrete floors and brick walls absorb heat during the day and radiate it back out at night. While heat-loving peppers love this, delicate salad greens can cook.
During blistering summer heatwaves, I use simple adjustments:
-
Elevate pots off hot concrete using plant caddies or wooden blocks so air circulates underneath.
-
Group pots closely together; they create a shared mini-humidity zone that slows down soil evaporation.
-
Move sensitive containers into temporary afternoon shade during peak July temperatures.
What Vegetables Grow Best in Pots (And What to Avoid)
Almost any vegetable can technically be grown in a pot if the container is large enough, but some crops are absolute superstars in containers, while others are a waste of time and space.
The All-Star Container Crops
-
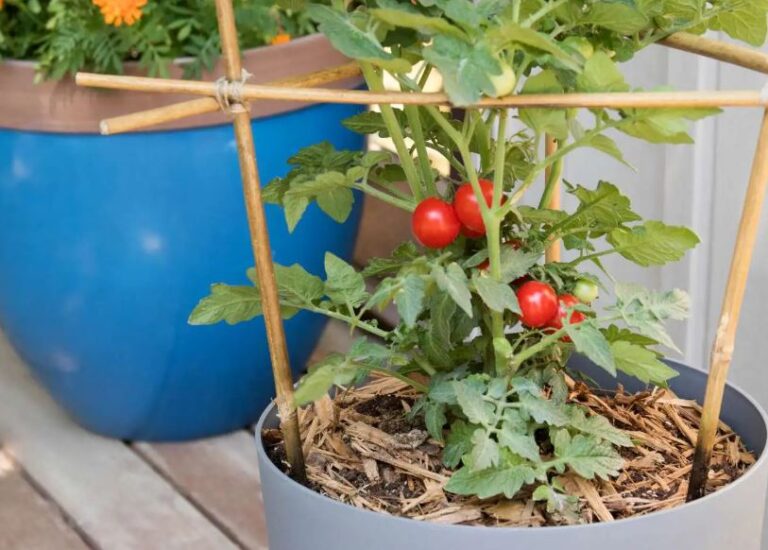
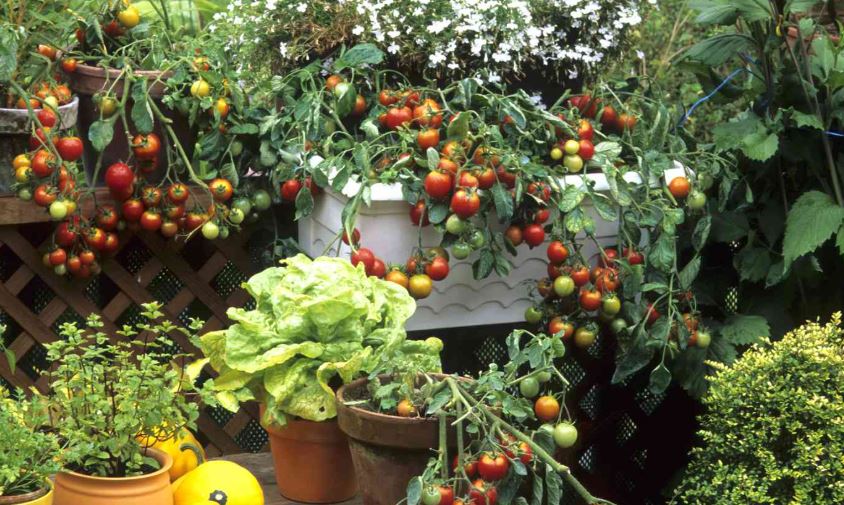
Cherry and Micro-Dwarf Tomatoes: Forget massive beefsteak vines. Compact determinate varieties like ‘Tiny Tim’, ‘Tumbler’, or ‘Red Robin’ produce prolific clusters of fruit on small, tidy plants.
-
Bush Beans: Unlike pole beans that require giant 8-foot A-frame trellises, bush beans stay compact (12–18 inches tall) and yield heavy handfuls of snap beans.
-
Radishes: Ready in 21 to 28 days, radishes are the ultimate instant gratification crop for shallow pots.
-
Loose-Leaf Lettuce: Using the cut-and-come-again method, a single 12-inch bowl of mixed lettuce will provide salad greens for an entire family all spring and autumn.
-
Chili and Sweet Bell Peppers: Peppers love the heat generated around containers, remain upright and architectural, and produce heavily in 3- to 5-gallon pots.
What to Skip in Containers
-
Sweet Corn: Requires mass pollination blocks and takes up massive root space for very little return per square foot.
-
Winter Squash and Long-Vining Pumpkins: Their vines travel 15 feet across the ground and require root networks far too large for standard patio pots.
-
Maincrop Potatoes: While you can grow potatoes in grow bags (and I do sometimes), it requires constant “hilling” of soil and massive water volumes compared to the ease of greens or bush beans.
Watering: The Daily Rhythm of Container Gardens
If you ask me what causes 90% of container gardening failures, the answer is simple: mismanaged water.
In the ground, plants have a buffer. In a pot, soil dries out rapidly under wind and sun. Conversely, if you water without checking and the drainage clogs, the plant drowns.
My Golden Rules for Watering Pots:
-
The Finger Test: Never water on a rigid calendar schedule. Shove your index finger deep into the soil up to the second knuckle. If it feels dry and warm down there, it’s time to water. If it still feels damp and cool, leave it alone.
-
Water Deeply: When you water, do it until water streams freely out of the bottom drainage holes. A light splash on the surface only wets the top inch of soil, leaving the root zone parched underneath.
-
Time It Right: Water early in the morning ($6\text{ AM} to 9\text{ AM}$). This gives plants maximum hydration before the afternoon heat hits. Avoid watering late at night, as wet foliage sitting in cool dark air invites fungal diseases like powdery mildew.
-
Consider Self-Watering Planters: If you travel or have a busy schedule, self-watering pots (like EarthBox systems) use capillary action to draw water up from a hidden reservoir, eliminating daily guesswork.
Feeding and Nutrition: Keeping Confined Plants Thriving
Because container soil volume is limited and frequent watering washes soluble nutrients out through the drainage holes, potting soil exhausts its nutrition quickly.
When I first started, I expected soil to feed my plants all season long. By mid-summer, my potted plants turned yellow and stunted. Now, I treat container feeding as a non-negotiable routine.
-
The Base Amendment: Always mix slow-release organic fertilizer granules or rich worm castings directly into your potting mix at planting time.
-
The Liquid Regimen: Starting about three weeks after planting, feed your containers every 10 to 14 days with a diluted organic liquid fertilizer.
-
For leafy greens and herbs, choose high-nitrogen formulas (like fish emulsion) to boost green foliage.
-
For fruiting crops like tomatoes, peppers, and beans, switch to a balanced or high-phosphorus/potassium formula once blossoms appear to encourage fruit set and prevent blossom-end rot.
-
Pests, Diseases, and Common Container Failures
One of the great joys of container gardening is escaping many ground-dwelling pests like cutworms, moles, and weeds. However, pots come with their own unique set of minor headaches:
-
Fungus Gnats: Those tiny black flies buzzing around your indoor or sheltered patio pots. They thrive in constantly damp topsoil. The fix: Let the top two inches of soil dry out completely between waterings, and top-dress the soil with a layer of horticultural sand or fine gravel.
-
Aphids: Soft-bodied green or black bugs that cluster on tender new shoots. The fix: Blast them off with a sharp stream of water from a spray nozzle, or wipe stems down with a mild solution of organic insecticidal soap.
-
Blossom-End Rot: That ugly black, sunken patch on the bottom of your tomatoes or peppers. It’s caused by inconsistent watering—when a plant swings between drought and flood, it cannot absorb calcium efficiently. Keep your moisture routine steady.
Advanced Container Strategies: Maximizing Small Spaces
Once you master the basics, you can squeeze incredible yields out of a tiny footprint using three advanced strategies:
1. Succession Planting
Don’t plant an entire packet of radish or lettuce seeds on the same day. Sow a small pinch every 10 to 14 days. This staggers your harvests, ensuring a continuous, manageable supply of fresh food rather than an overwhelming glut all at once.
2. Companion Planting in Large Tubs
In large containers or stock tanks (24 inches wide or more), combine plants with complementary habits:
-
Plant a central staked tomato or pepper plant, surround it with low-growing basil (which deters pests), and edge the perimeter with shallow-rooted green onions or trailing nasturtiums.
-
Pair deep-rooted crops with shallow-rooted crops so they don’t compete for the same soil strata.
3. Vertical Stacking
Utilize vertical space by adding small trellises, netting, or tomato cages inside pots for climbing crops like snap peas, pole beans, or small pickling cucumbers, leaving the soil surface free for low-growing herbs or strawberries.
Frequently Asked Questions
Can you really grow a full-size tomato plant in a pot?
Yes, but you need a large container—at least a 5- to 10-gallon capacity (18 to 24 inches deep)—along with strong staking or a heavy-duty tomato cage. Indeterminate vining varieties require rigorous pruning, while determinate or dwarf varieties manage container life much more easily.
Can I reuse container potting soil next year?
Generally, yes, provided the plants grown in it were healthy and free of persistent soil-borne diseases. However, old soil loses its structure and nutrients. To reuse it safely, dump the old soil into a wheelbarrow, break up any root clumps, and mix it 50/50 with fresh compost and perlite before refilling your pots.
How do I stop my pots from blowing over in the wind?
Top-heavy plants like tall tomatoes or peppers in lightweight plastic pots act like sails in high winds. To anchor them, use heavier containers (like terracotta, ceramic, or thick wooden boxes), place bricks or stones at the base of fabric pots, or tie tall cages securely to an adjacent balcony railing or wall.
Do I need expensive equipment to start container gardening?
Not at all. Some of my most productive setups started as five-gallon buckets sourced for free from local bakeries, cheap plastic storage tubs with holes drilled in the bottom, and recycled nursery pots. Focus your budget on quality potting mix and good seeds rather than fancy containers.

- How to Grow Microgreens Without Soil Indoors: Easy Home Method - October 5, 2026
- Microgreens vs. Sprouts: Key Differences, Nutrition, Safety, and Which One to Eat - October 5, 2026
- 10 Best Garden Tools For Weed Removal 2027 - October 3, 2026