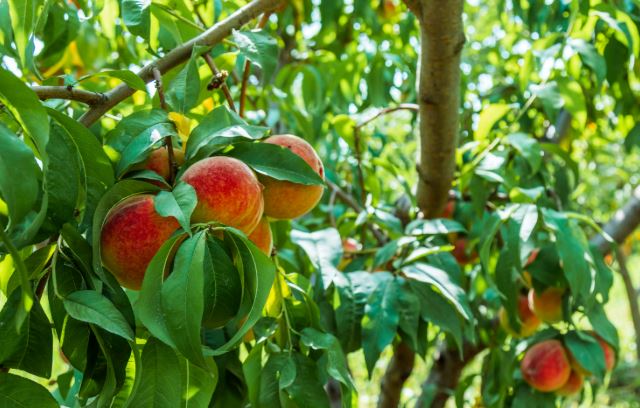
I first heard that you could skip the months-long refrigerator cold stratification process to grow a peach tree from seed, I was skeptical. Every single gardening book, online forum, and extension service guide I had ever read insisted that peach pits needed sixty to ninety days of chilling temperatures to break their natural dormancy. They argued that without simulating a harsh winter, the seed would sit in the soil indefinitely, confused and locked tight behind its stubborn shell and chemical inhibitors.
Then, out of sheer curiosity and a surplus of summer fruit, I tested an alternative approach.
Instead of burying pits in the yard through a freezing winter or tucking damp baggies into the back of my fridge for three months, I decided to bypass nature’s waiting room entirely. By physically cracking open the pit, extracting the inner seed, removing its inhibiting outer skin, and triggering rapid indoor germination, I watched a fresh peach seed sprout a healthy taproot in less than two weeks—all at normal room temperature.
If you want to grow a peach tree from seed without waiting months for cold stratification, this guide is everything I have learned through my own trials, errors, and ultimate successes.
Why Peach Seeds Ordinarily Require Cold Stratification
To understand how to bypass stratification, it helps to understand why traditional guidelines demand it in the first place.
In nature, a peach stone falls to the ground in autumn. The hard, woody shell (the endocarp) protects the delicate kernel inside from freezing temperatures, moisture rot, and hungry rodents. Inside that kernel, evolutionary biology has built-in survival mechanisms called dormancy inhibitors. These chemicals tell the seed, “Do not wake up now; winter is coming, and a frost will kill your tender shoots.”
Only after weeks of cold, damp winter conditions—known as cold stratification—do those chemical inhibitors break down. Simultaneously, moisture weakens the hard woody seam of the pit, allowing the seed inside to swell, crack the shell, and emerge as spring arrives.
So, how do we trick the seed into waking up without a three-month winter nap? We remove the barriers manually. We act as the winter weather and the cracking weight of the earth, letting the seed jump straight into active growth.
What You Will Need Before You Start
Before you throw away your peach pits after a summer snack, gather a few basic supplies. You don’t need expensive equipment, but having the right tools prevents you from accidentally crushing the living seed inside the pit.
-
Ripe Peach Pits: Choose freestone peaches if possible, as their pits release the seed much easier than clingstone varieties. Locally grown fruit adapted to your general climate region yields the best long-term survivors.
-
A Cracking Tool: A small hammer, a bench vise, or a pair of channel-lock pliers. A vise or pliers offer much better control than a hammer.
-
A Clean Towel: To wrap the pit during cracking so shards don’t fly across the room.
-
Distilled or Clean Tap Water: For soaking the naked seed.
-
Paper Towels: Unscented, high-quality kitchen paper towels.
-
A Reclosable Plastic Bag or Small Container: To create a mini-greenhouse chamber.
-
Ground Cinnamon or Diluted Hydrogen Peroxide: Optional, but invaluable for preventing mold growth during indoor germination.
-
Potting Mix and Small Nursery Pots: Well-draining, light, soilless potting mix.
Step-by-Step: The Non-Stratification Bypass Method
This is the exact sequence I use to get peach seeds to sprout in days rather than months. It requires patience with your hands, but the biological payoff is remarkably fast.
Step 1: Sourcing and Cleaning the Pit
Start by enjoying a fresh, perfectly ripe peach. Once you have eaten the flesh, thoroughly wash the remaining pit under warm running water to strip away all sugary residue. Leftover fruit sugars are a magnet for bacteria and mold, which can rot your seed before it ever gets a chance.
Once clean, let the pit dry completely on a counter for two to three days. A dry pit is much easier to crack cleanly than a wet, slippery one.
Step 2: Cracking the Pit (The Physical Bypass)
This is the most delicate part of the entire process. You need to open the hard wooden shell (the endocarp) without damaging the fragile, almond-shaped seed hiding inside.
-
Wrap the dried pit inside a clean kitchen towel.
-
Place it on a hard surface like a concrete floor or a sturdy workbench.
-
If using a hammer, tap the edge of the pit gently. You want to fracture the seam along the side rather than smash it to pieces.
-
Alternatively, place the side seam of the pit into a bench vise or channel-lock pliers and squeeze slowly until you hear a distinct pop or crack.
Open the shell halves carefully. Inside, you should find a plump, smooth, light-brown seed kernel that looks remarkably like a large almond. If the kernel is nicked slightly, it might still grow, but if it is squashed or deeply gouged, discard it and try another pit.
Step 3: Soaking and Peeling (Removing Inhibitors)
Even with the hard shell gone, the naked seed still carries a thin, papery brown skin (the seed coat) that contains minor germination inhibitors. While you can skip peeling, removing this skin cuts down germination time drastically.
-
Drop your extracted seed kernels into a small glass of room-temperature water and let them soak for twelve to twenty-four hours.
-
To prevent fungal spores from taking over in the warm humidity of a room, I like to add a single drop of food-grade hydrogen peroxide or a tiny pinch of ground cinnamon to the water.
-
After soaking, the seed coat will feel plump and slightly loose. Use your fingernails or a blunt pair of tweezers to gently peel away that brown skin, exposing the creamy-white or pale-yellow meat underneath. Be exceptionally gentle around the pointed tip—that is the root crown (radicle) where growth begins.
Step 4: The Paper Towel Germination Method
Now that you have bypassed winter cold stratification and stripped away the natural chemical locks, you can germinate the seed just like a bean or a tomato.
-
Take a clean paper towel and moisten it thoroughly with clean water, then wring it out so it is damp and spongy, not dripping wet.
-
Lay your peeled seed flat on one half of the paper towel, and fold the other half over to cover it.
-
Slide the wrapped seed into a plastic bag or a shallow plastic container with a lid. Do not seal the bag completely airtight; leave a small corner open for air exchange.
-
Place the container in a warm, dark location inside your home—such as a kitchen cupboard or atop a refrigerator where ambient temperatures hover around 70 degrees Fahrenheit to 75 degrees Fahrenheit (21 degrees Celsius to 24 degrees Celsius).
Step 5: Monitoring and Sprouting
Check on your seed every three to four days. Open the bag gently to let fresh air circulate and check the moisture level of the paper towel. If it feels like it is drying out, mist it lightly with a spray bottle.
Within seven to fourteen days, you will notice a miraculous change. The seed will swell slightly, split open along its natural seam, and a crisp white taproot will emerge from the pointed end. Once that root grows to be about half an inch to an inch long, it is time to get it into soil before it becomes tangled in the paper fibers.
Planting Your Sprouted Peach Seed
Moving a delicate indoor-germinated seed into soil requires care. The new taproot is eager to plunge downward, so handling it improperly can stunt or kill the young plant.
Soil Preparation
Never use heavy clay garden soil for potted seedlings. It compacts, retains too much water, and suffocates new roots. Mix your own or buy a bag of light, well-draining potting medium formulated with a blend of peat or coir, perlite, and a small amount of worm castings for early nutrition.
Pot Selection
Choose a container that is at least 8 to 10 inches deep with clear drainage holes at the base. Deep pots accommodate the fast-growing taproot of a peach seedling much better than wide, shallow trays.
The Planting Process
-
Fill your pot with moistened potting mix, leaving about an inch of space at the top.
-
Use your finger to dig a small hole about 1 to 2 inches deep in the center.
-
Carefully lay the sprouted seed into the hole with the white taproot pointing downward. If you aren’t sure which way is down, lay the seed flat on its side; nature’s intelligence will guide the root down and the shoot up.
-
Gently cover the seed with soil, pressing down lightly to ensure good contact, but do not pack it down tightly.
-
Water the pot gently to settle the soil around the root, allowing excess water to drain out the bottom.
Comparison: Traditional Stratification vs. The Rapid Bypass Method
To help you decide which route fits your gardening style, here is a direct comparison between the months-long winter method and the indoor bypass technique:
| Feature / Metric | Traditional Cold Stratification | The Rapid Bypass Method (No Stratification) |
| Time to Germination | 60 to 90+ days in a refrigerator or outdoors | 7 to 14 days at room temperature |
| Equipment Needed | Refrigerator, damp sand or paper towels, storage bag | Hammer/vise, water, paper towels, warm dark spot |
| Mold & Rot Risk | Moderate to high over long multi-month storage | Low (monitored closely week-to-week) |
| Control Over Process | Low (seed hidden inside shell until spring) | High (direct visibility during every phase) |
| Best Suited For | Patient gardeners mimicking natural seasonal cycles | Gardeners seeking fast results or indoor winter projects |
Early Care and Nurturing Your Peach Seedling
Once your peach seedling breaks through the soil surface and unfurls its first set of bright green leaves (cotyledons), its survival depends on proper light, water, and climate management.
Sunlight Requirements
Peach trees love sun. If you sprouted your seed indoors during winter or early spring, place the pot on your sunniest windowsill—ideally facing south or west. If natural sunlight is weak in your region during those months, supplement with a simple LED grow light positioned 6 inches above the plant for 12 to 14 hours a day. Once all danger of hard frost passes in your local area, gradually introduce the potted tree to outdoor sun.
Watering Etiquette
Let the top inch of soil dry out completely between watering sessions. Stick your finger into the pot; if it feels dry and crumbly down to your first knuckle, water deeply until moisture runs out of the drainage holes. Never let the pot sit in a saucer of standing water, as peach roots rot quickly when deprived of oxygen.
Regional Considerations: USA, UK, and Australia
Growing a peach tree from seed adapts differently depending on where you garden in the world. Climate zones dictate when you can move your tree outside and how it handles seasonal shifts.
United States
-
USDA Zones 5 through 9: Most standard peach varieties thrive across these zones. If you start your seeds indoors in late winter (January or February) using the bypass method, your seedling will be a sturdy 1 to 2 feet tall by the time summer arrives, ready to be stepped up into a larger 5-gallon container or planted directly into the ground in autumn.
-
Northern Tiers (Zone 4 and colder): Keep your seedling containerized for its first two winters. Bring the potted tree into an unheated garage or shed during the absolute deepest freezes to protect its tender young root ball from frost heave.
United Kingdom
-
RHS Hardiness H4 to H6: The UK climate is cooler, and peaches excel when grown as fan-trained trees against a south-facing brick wall or inside a polytunnel/greenhouse.
-
Start your seeds indoors in early spring (March or April) under a grow light. Because British summers can be damp and unpredictable, keep your containerized peach in the sunniest spot available—such as a patio or lean-to greenhouse—to ensure the wood ripens properly before autumn.
Australia
-
Temperate to Subtropical Zones (Melbourne, Sydney, Adelaide, Perth): Australia offers fantastic peach-growing conditions. Because seasons are inverted in the Southern Hemisphere, start your seeds indoors around July or August (late winter). This allows your seedling to catch the burst of spring warmth right as it transitions outdoors.
-
In warmer subtropical Queensland or coastal regions, ensure you select low-chill peach cultivars, as standard varieties may struggle without sufficient winter cooling once the tree matures.
Timeline Milestones: What to Expect Next
Growing a fruit tree from seed is an exercise in long-term satisfaction. Here is a realistic roadmap of what your tree will do over the coming seasons:
| Growth Stage | Timeline | Primary Care Focus |
| Germination & Sprouting | Weeks 1 to 3 | Maintain warmth, monitor root emergence, keep soil damp. |
| First Set of True Leaves | Months 1 to 3 | Provide maximum sunlight, water when dry, protect from pests. |
| Rapid Vegetative Growth | Months 3 to 6 | Repot into a larger 3-to-5 gallon container, apply balanced organic fertilizer monthly. |
| First Winter Dormancy | Month 6 to 12 | Tree drops leaves; protect roots from hard freezes if containerized, minimal watering. |
| First Pruning & Ground Planting | Year 2 | Plant permanently in the landscape, shape the central scaffold branches in late winter. |
| First Harvest | Years 3 to 5 | Thin heavy fruit clusters in spring; enjoy your first homegrown peaches. |
A Realistic Word on Peach Genetics and Fruit Quality
Before you invest years into your seed-grown peach tree, it is important to manage expectations regarding the fruit it will eventually produce.
Unlike apple trees—which are notoriously heterozygous, meaning a seed from a Honeycrisp apple will almost always grow into a tree bearing completely unpredictable, often sour fruit—peaches are predominantly self-pollinating and tend to come relatively true to seed.
If you planted a pit from a sweet, delicious supermarket peach or a backyard tree, there is a very high probability your seedling will produce tasty fruit. However, it may not be an exact carbon copy of the parent fruit. It might ripen a week earlier, grow slightly smaller, or possess a slightly different flavor profile.
To me, that unpredictability is part of the magic. Watching a naked seed split open on a kitchen paper towel, nursing it through its infancy, and eventually walking out to harvest a bowl of sweet, sun-warmed peaches from a tree you started with your own hands is one of the most rewarding milestones any gardener can achieve. Skip the refrigerator, crack that shell open, and start growing your orchard today.

- How to Grow Microgreens Without Soil Indoors: Easy Home Method - October 5, 2026
- Microgreens vs. Sprouts: Key Differences, Nutrition, Safety, and Which One to Eat - October 5, 2026
- 10 Best Garden Tools For Weed Removal 2027 - October 3, 2026