How to Start a Vegetable Garden in 5 Steps If you want the immediate, bottom-line answer, here is how you start:
-
Find the Light: Pick a spot in your yard that gets a minimum of 6 to 8 hours of direct, unfiltered sunlight every day.
-
Choose Your Bed Type: Decide between raised beds (best for control), container pots (best for patios), or in-ground gardening (most cost-effective).
-
Build the Soil: Invest heavily in high-quality organic soil and compost. Soil is the engine of your garden; if you get this right, the plants do the rest.
-
Pick Easy Crops: Start with high-yield, low-maintenance vegetables like radishes, cherry tomatoes, zucchini, lettuce, and bush beans.
-
Water Deeply and Consistently: Keep the soil consistently moist like a wrung-out sponge, watering at the base of the plants, not the leaves.
Welcome to the dirt. I remember the first time I held a sun-warmed tomato that I had grown entirely from a tiny, insignificant-looking seed. It was misshapen, a little bruised on one side, and absolutely the best thing I had ever tasted. Starting a vegetable garden for the first time can feel incredibly daunting. You hear terms like “NPK ratios,” “hardiness zones,” and “companion planting,” and suddenly, putting a seed in the ground feels like trying to pass a college-level biology exam.
But I’m here to tell you: plants want to grow. They are genetically hardwired to survive. My job in this guide is to help you get out of their way and give them the foundational environment they need to thrive. Over the next few thousand words, I am going to walk you through every single phase of building your first vegetable garden, step by step, from picking the right patch of grass to harvesting your first crop.
Let’s dig in.
1. Choosing the Right Location
The most common mistake I see beginners make is placing their garden where it looks pretty, rather than where the plants actually need it to be. Location dictates everything.
The Rule of Sun
Vegetables are essentially little solar panels. They take energy from the sun and turn it into sugars (your food). Most fruiting vegetables—like tomatoes, peppers, cucumbers, and squash—require “full sun.” In gardening terms, full sun means 6 to 8 hours of direct sunlight per day.
Before you buy a single seed, I want you to spend a weekend observing your yard. Watch where the shadows fall at 9 AM, 12 PM, and 4 PM. Keep in mind that the sun’s trajectory changes; it’s much higher in the mid-summer sky than it is in early spring.
If you only have a shady yard, don’t despair. You can still grow a garden, but you need to adjust your expectations.
Water Access
Your garden needs to be near a water source. A gallon of water weighs over 8 pounds. Trust me, in the middle of a blazing July heatwave, the last thing you want to do is lug heavy watering cans across a quarter-acre of lawn. If your hose doesn’t easily reach your chosen garden spot, you need to pick a new spot or invest in a longer hose.
Topography and Drainage
Avoid low spots in your yard where water pools after a heavy rain. Vegetables hate “wet feet” (roots sitting in waterlogged soil), which leads to root rot. A slight south-facing slope is the holy grail of garden placement, as it warms up faster in the spring and drains excess water beautifully.
2. Deciding on Your Garden Type
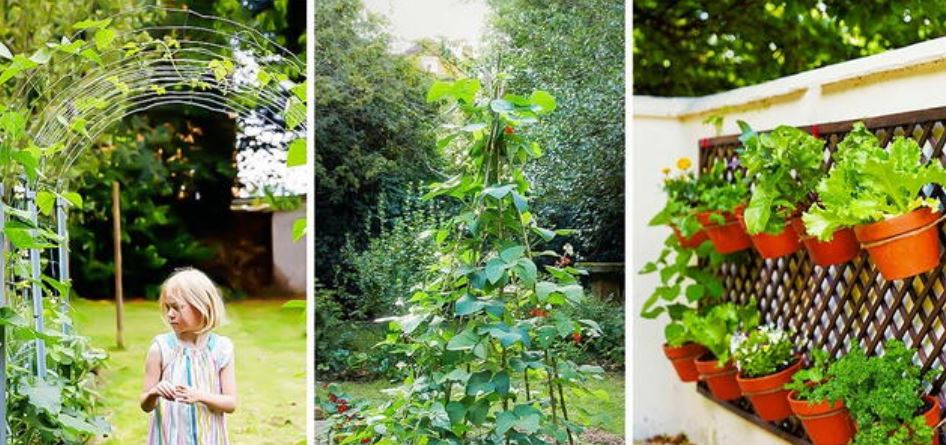
Once you have your sunny, accessible location, you need to decide how you are going to plant. You have three main options: in-ground beds, raised beds, or containers.
In-Ground Gardens
This is the traditional method: you till or dig up the existing grass, amend the soil, and plant directly into the earth.
-
Pros: It is the cheapest way to start. You don’t need to buy lumber or massive quantities of bagged soil. It also retains moisture better during deep droughts.
-
Cons: You are at the mercy of your native soil (which might be heavy clay or pure sand). It requires back-breaking labor to start, and you will fight more weeds.
Raised Beds
This is my top recommendation for beginners. You build a frame (usually out of untreated cedar or pine, galvanized steel, or stone) that sits on top of the ground, and you fill it with a custom soil mix.
-
Pros: Perfect soil from day one. Excellent drainage. The soil warms up faster in the spring, allowing for earlier planting. Less bending over, and far fewer weeds.
-
Cons: The initial setup cost is higher due to materials and the volume of soil needed to fill the boxes. They also dry out faster than in-ground beds, requiring more frequent watering.
Container Gardening
If you live in an apartment, have only a balcony, or have terrible yard conditions, containers are your savior.
-
Pros: Can be placed anywhere. Excellent for small spaces. Total control over soil and pests.
-
Cons: Pots dry out incredibly fast; in peak summer, I sometimes have to water my pots twice a day. Yields are generally smaller.
3. Soil Science Made Simple
I cannot stress this enough: Do not plant a ten-dollar plant in a ten-cent hole. Your soil is the lifeblood of your garden. Beginners often treat soil like it’s just “dirt” holding the plant up. In reality, healthy soil is a living, breathing ecosystem filled with billions of microbes, fungi, and earthworms that break down nutrients so your plants can eat them.
Understanding Soil Texture
Native soil generally falls into three categories:
-
Clay: Tiny particles that pack tightly together. Holds nutrients incredibly well, but drains terribly and turns into concrete in the summer.
-
Sand: Large particles. Drains instantly, but nutrients wash right through before plants can use them.
-
Loam: The holy grail. A perfect balance of clay, sand, and silt. It holds moisture but drains freely, and it is packed with nutrients.
The Magic of Compost
Whether you are planting in the ground or in raised beds, the answer to almost every soil problem is organic matter, specifically compost. Compost is decayed organic material (leaves, grass clippings, kitchen scraps).
-
If you have heavy clay, compost breaks it up and improves drainage.
-
If you have sandy soil, compost acts like a sponge to hold water and nutrients.
-
If you have raised beds, mixing 50% high-quality topsoil with 50% compost creates a beginner-proof growing medium.
The Big Three: N-P-K
When you buy fertilizer, you will see three numbers on the bag (e.g., 5-5-5 or 10-4-3). These represent Nitrogen (N), Phosphorus (P), and Potassium (K).
-
Nitrogen (N) is for shoots: It promotes lush, green leafy growth. (Crucial for lettuce and spinach).
-
Phosphorus (P) is for roots and fruits: It promotes root development and flower/fruit production. (Crucial for tomatoes and peppers).
-
Potassium (K) is for overall health: It helps plants resist disease and survive stress.
If you give a tomato plant massive amounts of Nitrogen, you will get a giant, beautiful, ten-foot-tall green bush… with absolutely zero tomatoes on it. Use a balanced, slow-release organic fertilizer to start.
4. The Beginner’s Dream Team (What to Grow)
As a beginner, I want you to experience quick wins. Do not try to grow artichokes, celery, or huge heirloom pumpkins your first year. Start with plants that are forgiving, fast-growing, and highly productive.
Here is my curated list of the best beginner vegetables:
1. Radishes
-
Why: They are the instant gratification of the garden world. You plant a seed, and 25 to 30 days later, you pull up a crunchy, spicy radish.
-
Pro-Tip: Plant a new row of radishes every two weeks (succession planting) for a continuous harvest all spring.
2. Zucchini (Summer Squash)
-
Why: Zucchini is famous for being overly productive. A single plant can easily feed a family of four for a month.
-
Pro-Tip: Zucchini plants get massive (often 3-4 feet wide). Give them plenty of space, and pick the fruits when they are small (6-8 inches) for the best flavor.
3. Cherry Tomatoes
-
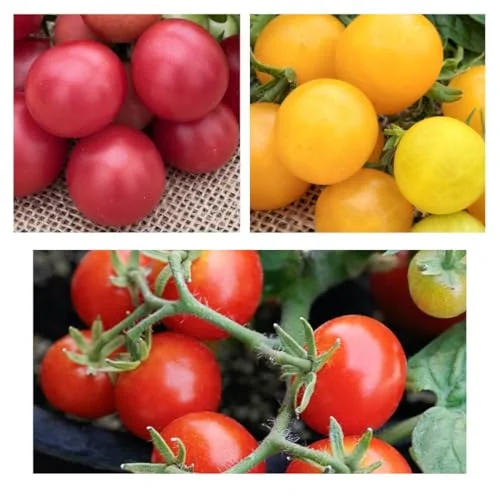
Why: Large slicing tomatoes take a long time to ripen and are prone to splitting and disease. Cherry tomatoes (like ‘Sungold’ or ‘Sweet 100’) are vigorous, disease-resistant, and produce hundreds of sweet fruits.
-
Pro-Tip: Plant the stem deeply. Tomatoes are unique; they will grow new roots along the buried stem, making for a much stronger plant.
4. Bush Beans
-
Why: Unlike pole beans, bush beans don’t require a trellis to climb. They grow into compact, 2-foot bushes and produce heavily over a few weeks. Furthermore, beans are “nitrogen fixers”—they actually pull nitrogen from the air and leave it in the soil, improving your garden for next year.
-
Pro-Tip: Wait until the soil is thoroughly warm before planting; bean seeds rot in cold, wet spring soil.
5. Leaf Lettuce
-
Why: Heading lettuces (like Iceberg) are tricky because they take a long time to mature and often bolt (go to seed and turn bitter) in the heat. Loose-leaf lettuces can be harvested multiple times; just snip off the outer leaves and let the center keep growing (a method called “cut-and-come-again”).
-
Pro-Tip: Lettuce is a cool-season crop. Grow it in the early spring and early fall. In the summer heat, it will turn incredibly bitter.
5. Planning Your Layout & Spacing
Now that we know where the garden is going, what type of beds we have, and which plants we are growing, we need to map it out.
The biggest rookie mistake is planting things too close together. When you buy a 3-inch tomato seedling, it looks so small and innocent. By August, it is a 6-foot jungle monster that has smothered the peppers next to it.
Read the seed packets carefully for “spacing requirements.” A good rule of thumb for raised beds is the Square Foot Gardening method, which divides the bed into 1×1 foot grids.
-
1 per square: Tomatoes, peppers, broccoli, cabbage.
-
4 per square: Leaf lettuce, Swiss chard, corn.
-
9 per square: Bush beans, spinach.
-
16 per square: Carrots, radishes, scallions.
Companion Planting
Plants are like people; they do better when surrounded by good neighbors. Companion planting is the practice of placing plants together that benefit each other.
-
The Classic “Three Sisters”: Indigenous Americans perfected this. Plant Corn, Pole Beans, and Squash together. The corn provides a stalk for the beans to climb. The beans fix nitrogen in the soil to feed the heavy-feeding corn. The squash leaves act as a living mulch, shading out weeds and retaining moisture.
-
Tomatoes & Basil: They taste great together on a plate, and they grow beautifully together in the dirt. Basil helps repel insects that attack tomatoes.
-
Marigolds: I plant marigolds around the border of my entire garden. Their strong scent confuses pests and deters nematodes (microscopic root-eating worms) in the soil.
To help you visualize this properly, explore this interactive garden layout planner:
6. Seeds vs. Transplants
When you are ready to plant, you have two choices: starting from seed or buying young plants (transplants/starts) from a nursery. I strongly recommend that beginners do a mix of both.
Buy Transplants For:
-
Tomatoes
-
Peppers
-
Eggplants
-
Herbs (Rosemary, Thyme, Oregano)
Why? These plants require a very long growing season. To grow them from seed, you have to start them indoors under grow lights 6 to 8 weeks before your last frost date. It requires heat mats, special seed-starting mix, and perfect timing. Buy a healthy transplant from a local nursery to save yourself the heartbreak.
Direct Sow (Plant from Seed) For:
-
Root vegetables (Carrots, Radishes, Beets)
-
Beans and Peas
-
Squash and Zucchini
-
Cucumbers
-
Corn
Why? Root vegetables hate having their roots disturbed; if you try to transplant a carrot, it will grow deformed. Beans, squash, and cucumbers grow so fast from seed that paying $5 for a transplant is a waste of money.
7. The Planting Process: Step-by-Step
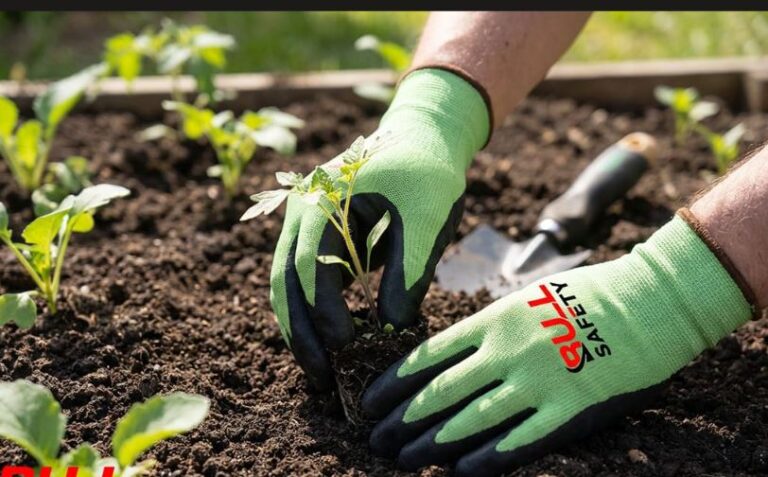
When the weather has warmed up and all danger of frost has passed in your area (find your local “average last frost date” online), it is time to put plants in the dirt.
8. Maintenance: The Daily Garden Walk
A garden is not a “set it and forget it” hobby. The secret to a successful garden is the gardener’s shadow. I highly recommend taking a 5-minute walk through your garden every single morning with a cup of coffee.
The Art of Watering
Improper watering kills more beginner gardens than pests or disease combined.
-
Deep and Infrequent: Do not water your garden lightly every single day. This encourages the plants to grow shallow, weak roots near the surface. Instead, water deeply (a long soak) 2 to 3 times a week depending on the heat. This forces the roots to dive deep into the soil searching for moisture, creating a resilient, drought-tolerant plant.
-
Water the Soil, Not the Leaves: Wet leaves are a breeding ground for fungal diseases like powdery mildew and blight. Aim your hose or watering can directly at the base of the plant. Better yet, install an inexpensive drip irrigation system or soaker hose.
-
The Finger Test: Unsure if you need to water? Shove your index finger into the soil up to the second knuckle. If it feels dry, water. If it feels moist, wait.
Weeding Strategy
Weeds compete with your vegetables for water, nutrients, and sunlight. If you let them take over, your vegetable yields will plummet.
-
Pull weeds when they are small; a tiny weed pulls out effortlessly, but a mature weed has a taproot that requires a shovel.
-
Mulch is magic. Lay down a 2-to-3-inch layer of organic mulch (like straw, untreated grass clippings, or shredded leaves) around your plants. Mulch blocks sunlight from reaching weed seeds, preventing them from germinating. It also acts like a lid on a pot, trapping soil moisture so you have to water less often.
Feeding Your Plants
Even with great soil, vegetables are heavy feeders. About a month after planting, your plants will have consumed a lot of the readily available nutrients. Apply a side-dressing of granular organic fertilizer, or feed them with a liquid organic fertilizer like fish emulsion or kelp extract every two weeks.
9. Pest Control: Embracing the Bug Ecosystem
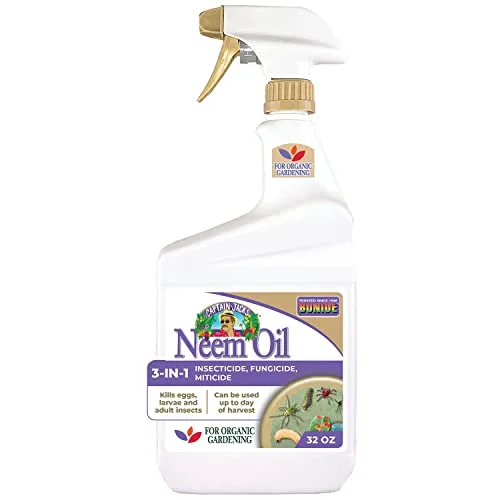
When beginners see a bug on their plant, their first instinct is usually panic, followed by an urge to spray everything with a nuclear chemical pesticide. Please, put the spray bottle down.
A healthy garden is a living ecosystem. If you spray a broad-spectrum pesticide, you will kill the bad bugs, but you will also kill the bees (which you need to pollinate your squash), the ladybugs, and the parasitic wasps.
Identifying the Enemy
-
Aphids: Tiny, pear-shaped bugs that cluster on the new growth of plants and suck the sap.
-
Solution: A strong blast of water from the hose knocks them off, and they generally cannot climb back up. Ladybugs eat them like candy.
-
-
Cabbage Worms: Velvety green caterpillars that chew massive holes in broccoli, cabbage, and kale leaves.
-
Solution: Hand-pick them off, or spray with Bacillus thuringiensis (Bt), a highly targeted organic bacteria that only harms caterpillars and is safe for humans and bees.
-
-
Tomato Hornworms: Massive, terrifying-looking green caterpillars with a horn on their tail. They can strip a tomato plant bare in 48 hours.
-
Solution: Hand-pick them and drop them in soapy water.
-
Inviting the Good Guys
Your goal is not zero bugs. Your goal is a balanced ecosystem where the predatory bugs control the pest bugs. You can attract beneficial insects by planting flowering herbs and native flowers in your vegetable garden. Dill, fennel, yarrow, sweet alyssum, and zinnias are incredible at attracting hoverflies, lacewings, and ladybugs.
10. The Harvest
This is why we do it. There is an art to harvesting vegetables that maximizes flavor and encourages the plant to keep producing.
-
Pick Early and Often: For crops like zucchini, cucumbers, and beans, the plant’s biological goal is to produce mature seeds. If you leave a cucumber on the vine until it gets massive, yellow, and woody, the plant thinks, “Mission accomplished, I made seeds,” and it will stop producing new flowers. By picking fruits while they are small and tender, you trick the plant into continually producing more.
-
Tomatoes: You do not have to leave a tomato on the vine until it is perfectly red. Once a tomato reaches the “breaker stage” (when the bottom just begins to blush with color), you can pick it and let it ripen on your kitchen counter. It will taste exactly the same, and you save it from being eaten by squirrels or splitting in a heavy rainstorm.
-
Greens: Harvest lettuce and spinach in the early morning while the leaves are crisp and full of water. If you harvest greens in the hot afternoon, they will be wilted and limp.
Frequently Asked Questions
When is the best time to start a vegetable garden? The timing depends entirely on your USDA Hardiness Zone and local climate. Generally, the gardening year begins in spring after the danger of the last frost has passed (usually between March and May for much of the US and Europe). However, cool-season crops (peas, radishes, spinach) can be planted a few weeks before the last frost, while warm-season crops (tomatoes, peppers) must wait until the soil is thoroughly warm.
How much does it cost to start a vegetable garden? An in-ground garden can be started for under $50 (the cost of a shovel, some seeds, and a few bags of compost). A basic 4×8 foot raised bed setup will typically cost between $150 and $300, accounting for the lumber, the bulk soil to fill it, seeds, and organic fertilizer. Container gardens can be done for $30-$100 depending on the size and quality of the pots.
Why are my vegetable plants growing tall but not producing any fruit? This is almost always due to one of three reasons:
-
Too much nitrogen: An excess of nitrogen fertilizer forces the plant to focus entirely on leafy growth at the expense of blossoms.
-
Lack of sunlight: If a tomato plant is in the shade, it will stretch upward (becoming “leggy”) desperately searching for light, and won’t have the energy to fruit.
-
Extreme temperatures: If the weather suddenly gets too hot (usually over 90°F / 32°C) or too cold, plants will drop their blossoms out of stress.
Is it safe to use treated lumber for raised beds? Modern pressure-treated lumber (treated with ACQ or copper azole) is generally considered safe for raised vegetable beds by the EPA, as the older, dangerous arsenic-based treatments were phased out in 2003. However, many organic gardeners still prefer to use untreated rot-resistant woods like cedar or redwood, or line the inside of treated boxes with thick plastic to prevent any potential copper leaching into the soil.
What is the easiest vegetable to grow for a total beginner? Radishes. They germinate in days, require very little nutrients, and are ready to eat in under a month. For fruiting plants, cherry tomatoes are incredibly forgiving, highly productive, and largely resistant to the diseases that plague larger heirloom tomatoes.
Final Thoughts
Starting a vegetable garden is not about perfection. You will inevitably lose a plant to a late frost, you will have a tomato stolen by a raccoon the day before you planned to pick it, and you will probably plant your zucchini way too close together.
Embrace the failures. Every dead plant is just a lesson for next season. The beauty of gardening is that the earth forgives you every spring, offering a blank slate and a fresh start. Keep your hands in the dirt, observe your plants daily, and don’t overcomplicate it. Sunlight, good soil, and consistent water—that’s the magic formula.

- How to Grow Microgreens Without Soil Indoors: Easy Home Method - October 5, 2026
- Microgreens vs. Sprouts: Key Differences, Nutrition, Safety, and Which One to Eat - October 5, 2026
- 10 Best Garden Tools For Weed Removal 2027 - October 3, 2026