How to Test Soil pH at Home With Test Strips
You can spend a lot of time and money buying fertilizers, planting seeds, and watering your garden, but if your soil pH is wrong, your plants will still struggle. Soil pH dictates how easily plants can absorb nutrients from the ground. If the soil is too acidic or too alkaline, those nutrients get locked away.
Testing your soil does not require a chemistry degree or an expensive laboratory test. You can find out exactly what is happening under the surface using simple pH test strips. This method is cheap, fast, and highly effective for everyday gardening and lawn care.
Here is exactly how to test soil pH at home with test strips so you can give your plants the environment they need to thrive.
Direct Answer / Quick Answer
To test soil pH with test strips, scoop a small soil sample from your garden and place it in a clean glass. Add equal parts distilled water and stir vigorously to create a muddy mixture. Wait 20 to 30 minutes for the soil particles to settle at the bottom. Dip the pH test strip into the clear liquid at the top for two to three seconds. Finally, match the strip’s color to the provided chart to find your soil’s pH level.
Understanding Soil pH
Soil pH is a measurement of how acidic or alkaline your soil is. The scale runs from 0 to 14. A pH of 7.0 is perfectly neutral. Numbers below 7.0 indicate acidic soil, while numbers above 7.0 indicate alkaline (or basic) soil.
Most plants prefer a slightly acidic to neutral pH, usually hovering right around 6.0 to 7.0. However, different plants have different requirements.
Nutrient Availability
The main reason you need to care about soil pH is nutrient availability. Plants eat by absorbing dissolved minerals through their roots. Elements like nitrogen, phosphorus, and potassium are highly available in slightly acidic soil.
If your soil pH drops to 5.0 (highly acidic), important nutrients like phosphorus become tied up in the soil chemistry and roots cannot absorb them. At the same time, toxic levels of aluminum and manganese can release into the soil.
If your soil pH rises to 8.0 (highly alkaline), iron, zinc, and copper become locked away. This often causes plant leaves to turn yellow while the veins stay green, a condition known as iron chlorosis.
Plant Specific Needs
Before you worry about changing your soil, you need to know what you are planting. You might test your soil and find a pH of 5.5. For a vegetable garden, that is a bit too acidic. But if you are growing blueberries, azaleas, rhododendrons, or potatoes, a 5.5 pH is completely normal.
Lawns typically prefer a pH between 6.2 and 7.0. If you are planting a mixed garden, aiming for a pH of 6.5 is usually the safest bet.
What You Need to Test Soil pH at Home
You do not need much equipment to get an accurate reading. Gather these items before you head out to the garden.
The Right Test Strips
Not all test strips are identical. You can buy universal pH test strips, which measure the full scale from 0 to 14. These are useful, but the color changes can be subtle and hard to read.
For better accuracy in the garden, look for narrow-range pH strips. These typically measure between 4.5 and 9.0. Because the range is smaller, the color differences on the chart are much more distinct, making it easier to pinpoint your exact soil pH.
Distilled Water
You must use distilled water for this test. Tap water is treated by your local municipality. It usually has minerals added to it, and its pH is often adjusted to prevent pipe corrosion. If your tap water has a pH of 7.5 and you mix it with your soil, it will skew the results of your test.
Bottled spring water also contains natural minerals that will change your reading. Distilled water is pure H2O with a completely neutral pH of 7.0. It is the only way to get an accurate reading of the soil itself.
Clean Tools and Containers
You will need a clean hand trowel to dig your soil sample. You also need a clean glass jar or plastic cup to mix the soil and water. Make sure these containers have been washed and thoroughly rinsed. Leftover soap residue in a glass jar is highly alkaline and will immediately ruin your test results.
Advantages of Using Test Strips
Testing your soil with strips offers several clear benefits for home gardeners.
- Low Cost: A pack of 100 test strips usually costs less than ten dollars. You can test multiple garden beds for pennies per test.
- Speed: You get results the exact same day. Sending soil to a lab usually takes two to three weeks.
- Ease of Use: You simply match colors on a chart. There are no chemicals to measure and no complicated digital calibrations.
- Accessibility: You can find pH test strips at local pharmacies, pool supply stores, garden centers, or online.
Limitations of pH Test Strips
While this method is highly practical, you should be aware of a few drawbacks.
- Subjectivity: You are matching a colored square to a chart. Depending on the lighting in your house and your own eyesight, interpreting the exact color can be slightly subjective.
- Lacks Detailed Analysis: A test strip tells you the pH, but it does not tell you if your soil lacks nitrogen, phosphorus, or potassium.
- Expiration Dates: pH strips use reactive chemicals on the paper pads. If the strips are several years old or have been exposed to high humidity, they will stop reacting accurately.
- Water Clarity Issues: If you have heavy clay soil that refuses to settle in the water, the murky liquid can stain the paper strip, making it difficult to read the actual color change.
How to Test Soil pH at Home With Test Strips
Follow these exact steps to ensure you get a reliable, accurate reading of your garden soil.
- Prepare your tools. Wash your hand trowel and a clear glass or plastic cup. Rinse them completely with plain water to ensure absolutely no dish soap remains. Let them air dry.
- Clear the surface. Go to the area you want to test. Scrape away the top layer of mulch, leaves, weeds, and surface debris. You do not want organic matter skewing the test.
- Dig to the root zone. Do not test the dirt right on the surface. Dig down about 4 to 6 inches. This is where plant roots actually live and feed.
- Take a representative sample. If you are testing a large garden bed, take a small scoop of dirt from three or four different spots in that same bed. Mix them together in a clean bucket. This gives you an average reading for the whole area.
- Create the soil mixture. Place about two tablespoons of your soil sample into your clean glass.
- Add distilled water. Pour in distilled water until you have a 1-to-1 ratio of soil to water.
- Stir thoroughly. Use a clean spoon or stir stick to mix the soil and water vigorously for about one minute. You want the water to dissolve the minerals in the soil completely.
- Let the mixture settle. Walk away and leave the glass alone for 20 to 30 minutes. You need the heavy dirt particles to sink to the bottom. You should be left with a layer of muddy soil at the base and a layer of mostly clear liquid sitting on top.
- Dip the test strip. Take one pH test strip and hold it by the dry end. Dip the end with the colored pads into the clear liquid at the top of the glass. Hold it in the water for two to three seconds.
- Read the results. Pull the strip out and give it a gentle shake to remove excess water. Wait about 10 to 15 seconds for the colors to develop. Hold the strip up next to the color chart provided with the packaging. Find the closest color match to determine your pH.
Common Mistakes When Testing Soil pH
Many gardeners test their soil and get confusing results because they make simple errors during the process. Avoid these common pitfalls.
Using your hands to mix the soil
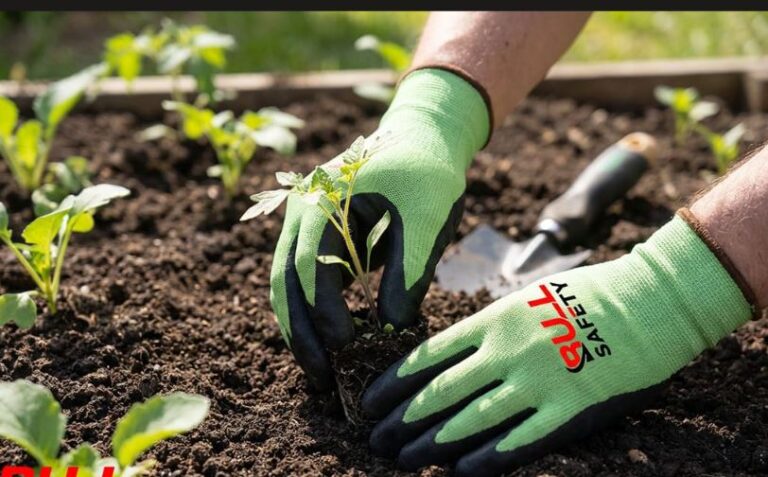
Human skin is naturally slightly acidic, usually sitting around a pH of 5.5. Your skin also has natural oils and sweat. If you handle the soil sample heavily with your bare hands, you can easily transfer that acidity to the dirt, altering your final reading. Always use a clean trowel or wear clean gardening gloves.
Touching the testing pads
When you pull a test strip out of the bottle, hold it only by the blank plastic or paper end. If you touch the reactive chemical pads with your fingers, the moisture and oils on your skin will start the chemical reaction before the strip ever touches the water.
Testing right after fertilizing
Fertilizers, compost, and manures temporarily alter the soil chemistry. If you add a heavy dose of synthetic fertilizer and test your soil two days later, you are testing the fertilizer, not the soil. Wait at least four to six weeks after applying fertilizers or soil amendments before taking a pH test.
Taking a sample from a single spot
Soil pH can vary wildly even within a few feet. One spot might have a pocket of old decomposing pine needles (which are acidic), while a spot three feet away might be mixed with old concrete rubble (which is alkaline). Always take samples from several spots in the target area and mix them together for an accurate average.
Reading the strip too late
Test strips are designed to be read immediately after the colors develop, usually within 15 to 30 seconds. If you dip the strip, set it on the counter, and come back ten minutes later, the colors will have dried and shifted. The reading will no longer be accurate.
Test Strips vs. Digital Meters vs. Lab Tests
If you are wondering whether test strips are the right choice for your garden, this comparison outlines how they stack up against the alternatives.
| Testing Method | Cost | Speed | Accuracy | Best Use Case |
| pH Test Strips | Low ($5–$15) | Fast (Minutes) | Moderate | Routine home garden checks and monitoring. |
| Digital Probe Meters | Medium ($15–$50) | Fast (Instant) | Moderate to High | Frequent testing without needing to mix soil and water. |
| Professional Lab Test | High ($20–$40 per sample) | Slow (1–3 Weeks) | Very High | Complete breakdown of pH, organic matter, and specific nutrients. |
What to Do With Your Results
Finding out your soil pH is only the first step. Once you know your number, you may need to adjust the soil to suit your plants.
How to Raise Soil pH (Make it more alkaline)
If your test strip turns red or orange, indicating a pH of 5.5 or lower, your soil is highly acidic. To raise the pH and sweeten the soil, you need to add agricultural limestone (lime). Pelletized lime is usually the easiest to spread in a home garden. Wood ashes from a fireplace will also raise soil pH, but they should be used sparingly as they can rapidly spike alkalinity.
How to Lower Soil pH (Make it more acidic)
If your test strip turns dark green or blue, indicating a pH of 7.5 or higher, your soil is alkaline. To lower the pH, you will need to add elemental sulfur or aluminum sulfate. Peat moss and pine needles also lower pH naturally, though they work much slower over several seasons.
Always follow the application rates on the bags of these amendments. Changing soil pH takes time. Add the amendment, wait two to three months, and test again before adding more.
Best Tips for Accurate Soil pH Testing
- Test in natural light. When you match your wet test strip against the color chart, do it outside or near a bright window. Warm yellow indoor bulbs or harsh fluorescent lights can distort how the colors look, leading you to misread the chart.
- Use coffee filters for muddy water. If you have high-clay soil that refuses to settle, leaving the water dark and muddy, you can strain it. Pour the muddy liquid through a standard paper coffee filter into a second clean glass. Test the clear liquid that drips through.
- Store strips properly. pH strips degrade if exposed to moisture, heat, or bright light. Keep them in their original airtight container and store them inside your house in a dark, dry drawer—not out in the humid garden shed.
- Test at the same time each year. Soil pH naturally fluctuates slightly with the seasons and rainfall. For the most consistent monitoring, test your garden at the same time every year, usually in early spring before planting.
Frequently Asked Questions
How often should I test my soil pH?
You should test your garden soil every two to three years. If you are actively trying to correct a severe pH problem by adding sulfur or lime, you should test the soil once every spring and once in the fall to monitor your progress.
Can I use pool test strips for soil?
Pool test strips can give you a rough estimate, but they are not ideal. Pool strips usually test for chlorine and alkalinity alongside pH, and the pH range on pool strips is often very narrow (usually 6.8 to 8.2). If your soil has a pH of 5.5, a pool strip will not be able to measure it accurately. It is better to buy standard wide-range or soil-specific pH strips.
Why do I need distilled water?
Distilled water has all minerals, chemicals, and impurities boiled out of it, leaving it with a perfect neutral pH of 7.0. Tap water, well water, and bottled drinking water all contain dissolved minerals that carry their own pH. If you use tap water, you are partially testing the water rather than just the soil.
How deep should I dig for a soil sample?
For lawns, dig down about 3 to 4 inches. For vegetable gardens and flower beds, dig down 4 to 6 inches. For testing the soil around large shrubs or trees, you may need to dig 6 to 8 inches deep. You want to test the soil exactly where the plant’s roots are actively growing.
Can I test my soil pH with baking soda and vinegar?
Yes, you can do a rough DIY test. Adding vinegar to a soil sample will cause it to fizz if the soil is highly alkaline. Adding baking soda and water to a soil sample will cause it to fizz if the soil is highly acidic. However, this method only tells you if you have extreme pH levels. It will not give you a specific number, making it very hard to know how much lime or sulfur to add.
What if my test strip color falls between two chart colors?
If the color on your strip looks like a mix between the 6.0 and 6.5 color blocks, your pH is likely around 6.2 or 6.3. Most home gardening does not require decimal-point precision. If you are hovering between two safe numbers, your soil is fine.
Does potting soil need to be tested?
Generally, no. Commercial bagged potting soils and seed-starting mixes are pre-formulated and pH-balanced by the manufacturer, usually sitting perfectly around 6.5. You only need to test native yard soil or raised beds filled with bulk topsoil and compost.
Final Takeaway
Testing soil pH at home with test strips is a fast, inexpensive way to figure out why your plants are thriving or struggling. Always remember to dig down to the root zone, mix samples from multiple spots, and use only distilled water for the most accurate reading. Once you know your soil’s pH, you can easily adjust it with lime or sulfur, giving your garden the exact environment it needs to produce healthy, vibrant plants.

- 10 Best Kink Resistant Rubber Garden Hose 2026 - October 26, 2026
- 10 Best Kink Resistant Expandable Garden Hose 2026 - October 26, 2026
- 10 Best Garden Hose For Washing Fences 2026 - October 26, 2026